

The Patrons View page is where you search for, view, add, and edit library patron records. Every user of Surpass Cloud, from patrons, to library staff, to administrators, has a patron record.
How To
- Search for Patrons
- Add and Edit Patrons
- Delete a Patron Record
- Add and Edit Patron Photos
- Change Patron Passwords
- Add and Edit Patron Family
- Add Patrons to Groups
- Customize Patrons List
- Collect Payments and Make Ledger Adjustments
- Making Notes
- View a Log of Edits
- Print a Patron Record
The Patrons View Page
Like many pages in Surpass Cloud, Patrons View uses a split-page design with a list of patrons on the left and details for the selected patron record on the right. The List and Detail panels can be expanded individually to the full width. See Getting Around for more about how to use split pages.
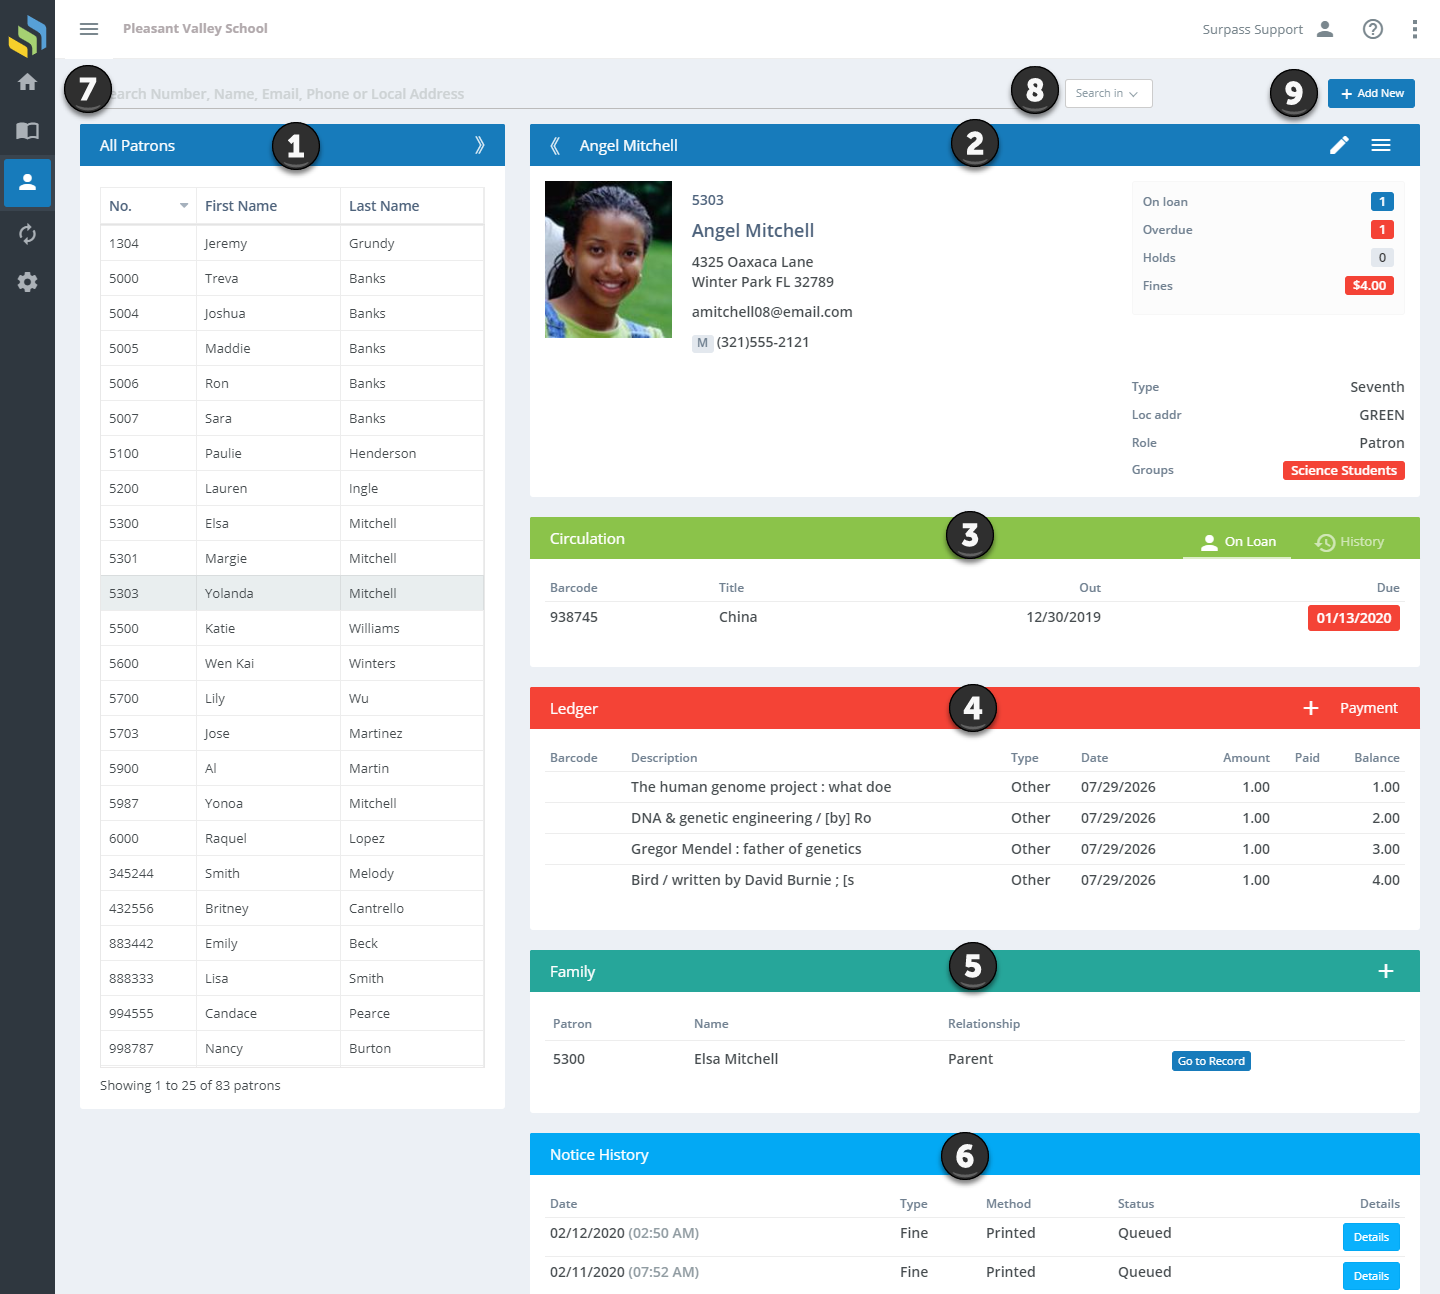
1. List Panel
The List panel shows the list of patron records found after you perform a search. Select a record from the list to see the record in the Detail Panel.
2. Detail Panel
The Detail Panel shows detailed information on the selected patron and is where you will edit the patron record to make any changes.
3. Circulation Panel
The Circulation Panel shows a list of resources currently on loan to the patron, the date each was checked out, and the due date. The due date is shown in red if overdue.
Use the On Loan and History tabs on the Circulation Panel to switch between showing what's currently on loan and showing the patron's full circulation history.
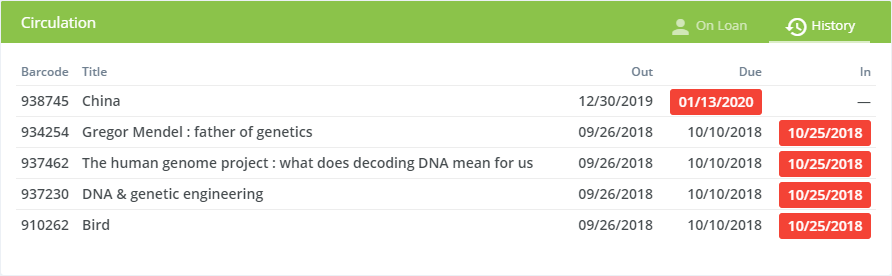
The Retain Circulation History setting, found on the Settings : Patron : General page, affects whether any history detail is shown here.
4. Ledger Panel
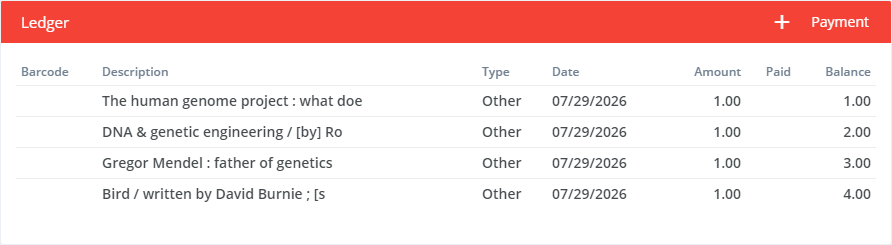
The Ledger Panel shows the history of fines, payments, and adjustments. You can record payments and add adjustments from this panel. See Collect Payments and Make Ledger Adjustments.
5. Family Panel

The Family Panel shows the relationships between this patron and others. See Add and Edit Patron Family.
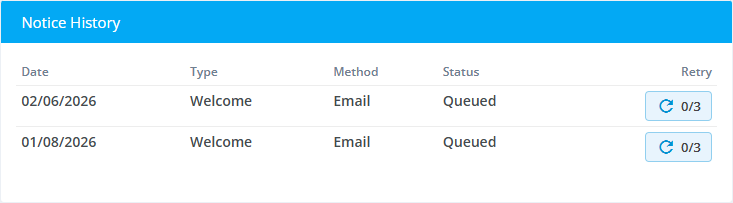
6. Notice History
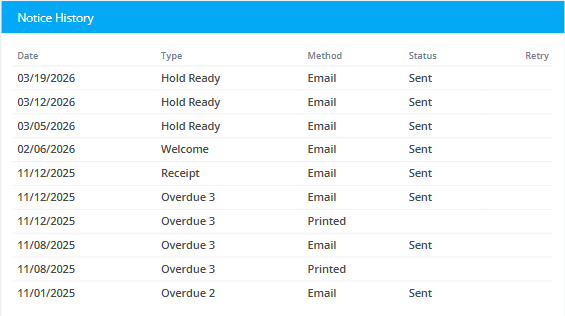
The Notice History panel shows a list of notices sent to the patron, by email, paper, or text. Click the on any notice to see the detail.
If a emailed failed to send there is a Retry option with a tracker of how many retries have been used. You can find all bounced emails using the the report under Patrons : Reports : Standard Reports : Bounced Email and Text Messages.
7. Search Bar

This is where you search for patron records. See Searching for Patrons.
8. Search-In Button
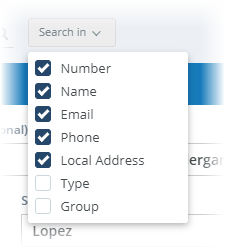
Click this button to access search options and change which field(s) you want to search. See Searching for Patrons.
9. Add New Button

Click the Add New button to add a new patron record.
10. Notes

The Notes panel shows any notes recorded on this patron record. See Patron Notes.
11. Restricted Resources

The Restricted Resources panel shows specific restrictions made to the patron. You can click to add a restriction or click on an existing restriction to delete it. See Restricted Resources.
12. Edit Log

The Edit Log panel shows when changes were made to the patron's record and who made them. You can click a row to see more detail. See Patron Edit Log.