


Page Layout
Surpass Cloud has a familiar and consistent layout designed to make it easy to get to anywhere from anywhere.
-
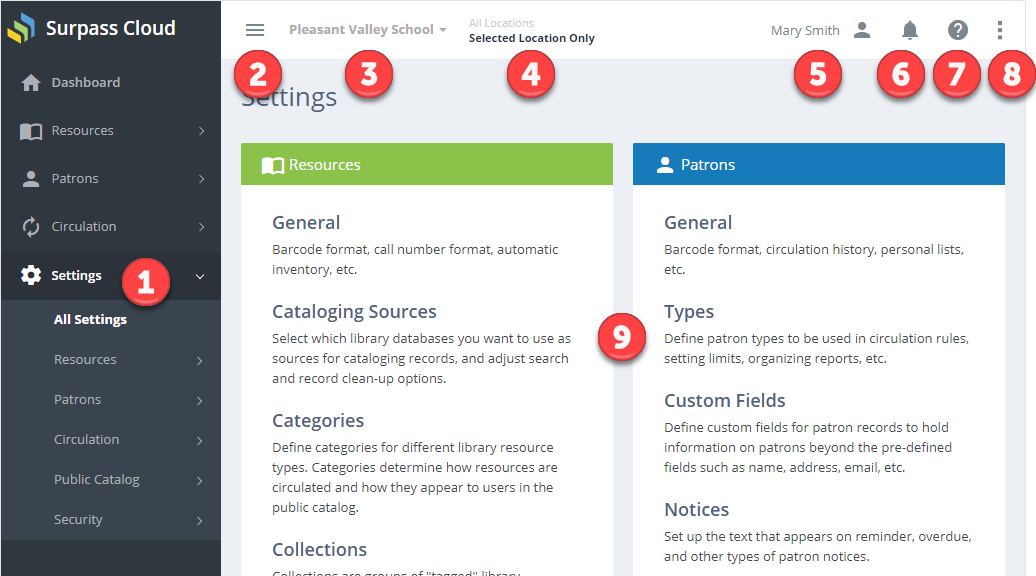
Menu - Every major feature in the Surpass Cloud Administrative app is accessible from the always-present menu on the left side of the page. Clicking on a main menu topic, such as Settings, reveals a submenu of additional choices.
-
When your screen size is small or when you simply want to see less of the menu or more detail, click the Menu Button to shrink the menu to icons only and again to expand it to the full size. Fun fact: this button icon is often called a "hamburger." Can you tell why?
-
Your Library Name appears prominently at the top of every page. If yours is a part of a multi-location Surpass Cloud system, you can switch from one library to another by clicking the library name and selecting from the drop-down menu.
-
If your library is part of a multi-location Surpass Cloud system, the All Locations/Selected Location Only button allows to you switch from seeing resources, patrons, settings, etc. for all locations or just for the selected location. Click this to toggle between the two options.
-
Your name is shown at the top of the page to indicate that you're logged into Surpass Cloud. Click here to select from a menu with options to jump to My Account (your patron record on the Patrons View page), Change Password, or to Log Out.
-
Notifications List shows you messages from Surpass Cloud that need your attention, such as when a patron using OPAC has placed a hold on a resource that is available in the library and needs to be set aside. A rocking red bell means you have new notifications. A steady red bell means that you have notifications that still require action on your part. See Notifications.
-
Help is always just a click away. Click the question mark button to get to the documentation you are reading now, then click "Help with this Page." You'll be taken directly to a page that's relevant to where you're currently working within Surpass Cloud.
A video tutorial on accessing help documentation is available on YouTube: Help with this Page.
-
The Sidebar button opens the handy Surpass Cloud sidebar, which gives you quick access to the most-recent patron and resource records you have viewed and also to page-specific settings.
-
The Main Body section of the page is what changes when you move from one feature to another.
Sidebars
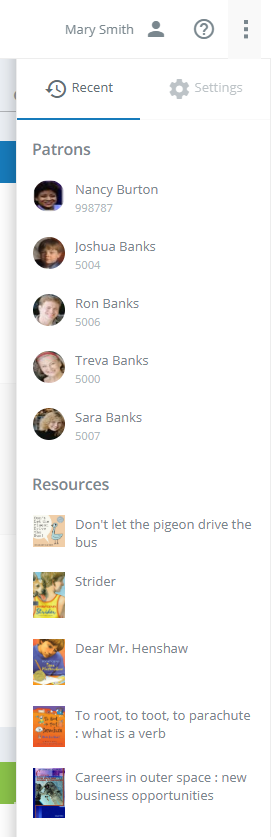
Click the Sidebar button at the top-right corner of any page in Surpass Cloud to view and hide the Sidebar for that page.
Recent Patrons and Resources
Every page's Sidebar has a list of patrons and resources you have viewed recently. Click any patron name or resource title on this list and you will be taken to either the Patrons : View or Resources : View page with that record loaded. This list is maintained for you from session to session, so it will be there for you the next time you log in.
Page-Specific Settings
Some pages' Sidebars have a Settings tab with settings specific to that page, such as the one below which appears on the Patrons : View or Resources : View page and/or convenient links to relevant Settings pages.
Split List with Detail Pages
On many pages, Surpass Cloud uses a layout with a list on the left and detail for the selected list item on the right. You make a selection on the left and the corresponding detail record is shown on the right. On some pages, you can expand and contract either the list or detail panels to the full width.
The examples below are from the Patrons : View page.
Split View
In Split View, the list is on the left and the detail on the right.
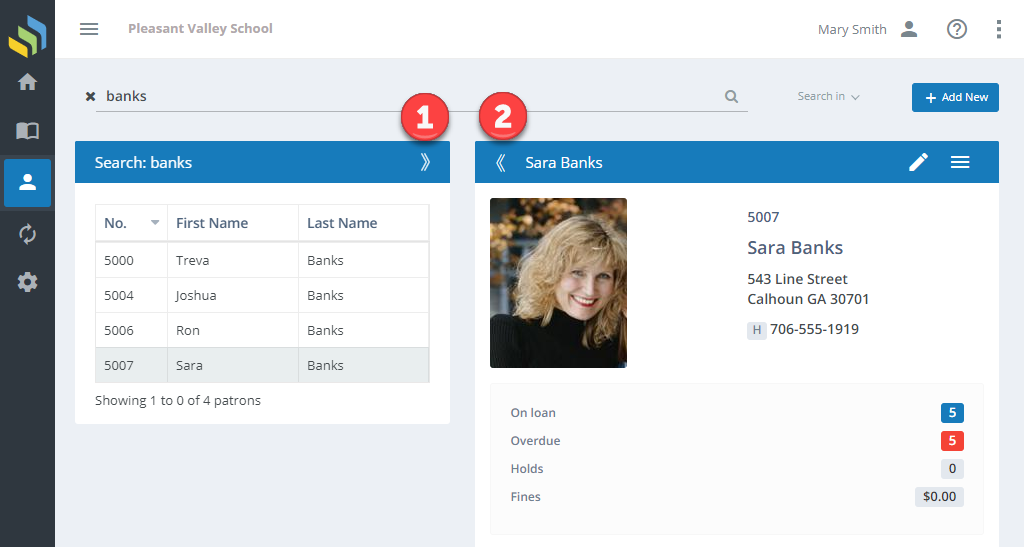
- Click the
>button on the list panel to expand it to the right to use the full width. - Click the
<button on the detail panel to expand it to the left to use the full width.
Expanded List View
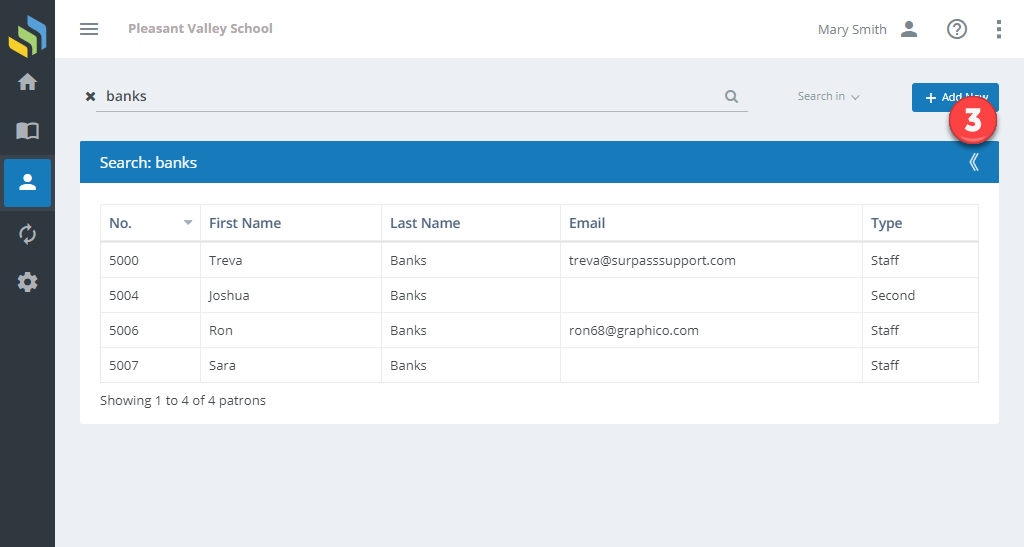
- Click the
<button on the expanded list panel to shrink it down to the left and show the detail panel in split view.
Expanded Detail View
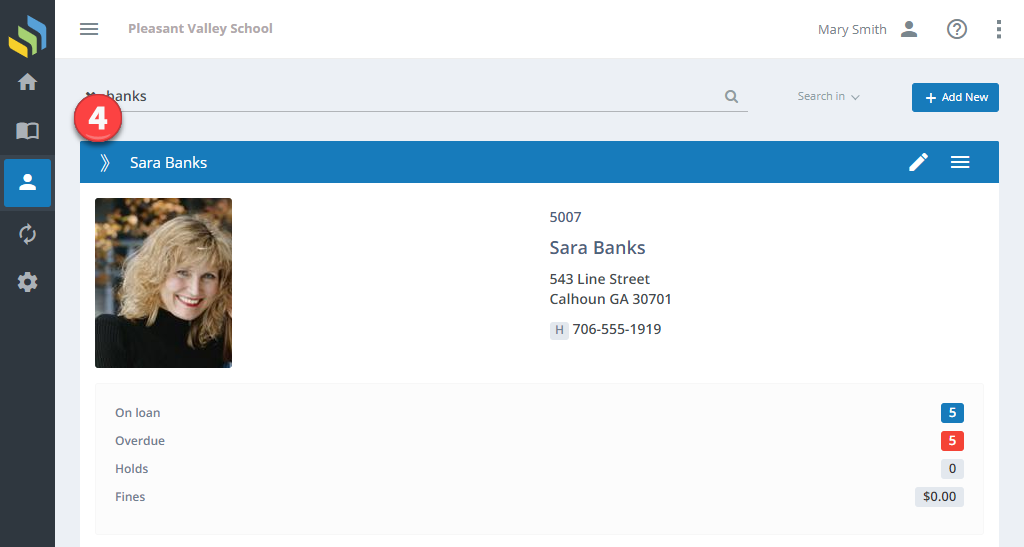
- Click the
>button on the expanded detail panel to shrink it down to the right and show the list panel in split view.