

This is where you give your report a name, say what you want on it, and set paper and font options.
There are two tabs on this panel: Design View and Set Paper & Font Sizes.
Design View
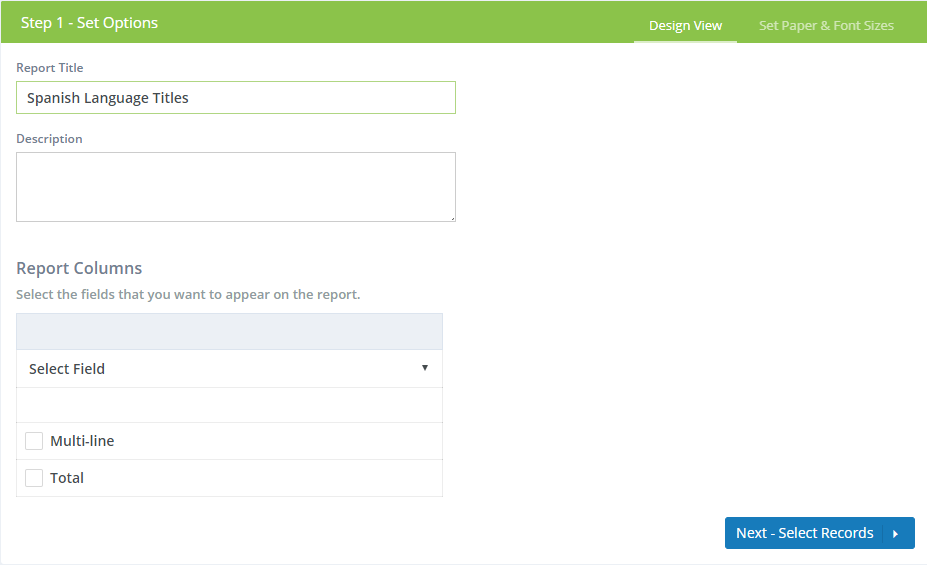
The Design View is where you name the report, give it an optional description, and layout the columns.
Options
-
Report title - Give your report a name. This name will be shown in the Custom Reports list and at the top of your report pages.
-
Description - If the purpose of the report is not obvious, you can use this space to add comments about the purpose of the report, etc. This description is shown under the report title in the Custom Reports list but is not printed on the report.
Report Columns
Reports are made up of columns and rows. There is one row for each resource (or holding, if you are including holdings in your report). Each row has columns containing values from fields that you select.
Adding Columns
When you first create a new report, you'll see one blank column. You start by selecting a field for this column. Once you have done that, you'll have another blank column to the right of the one you just created. Continue adding columns this way until you have all columns that you want in your report.
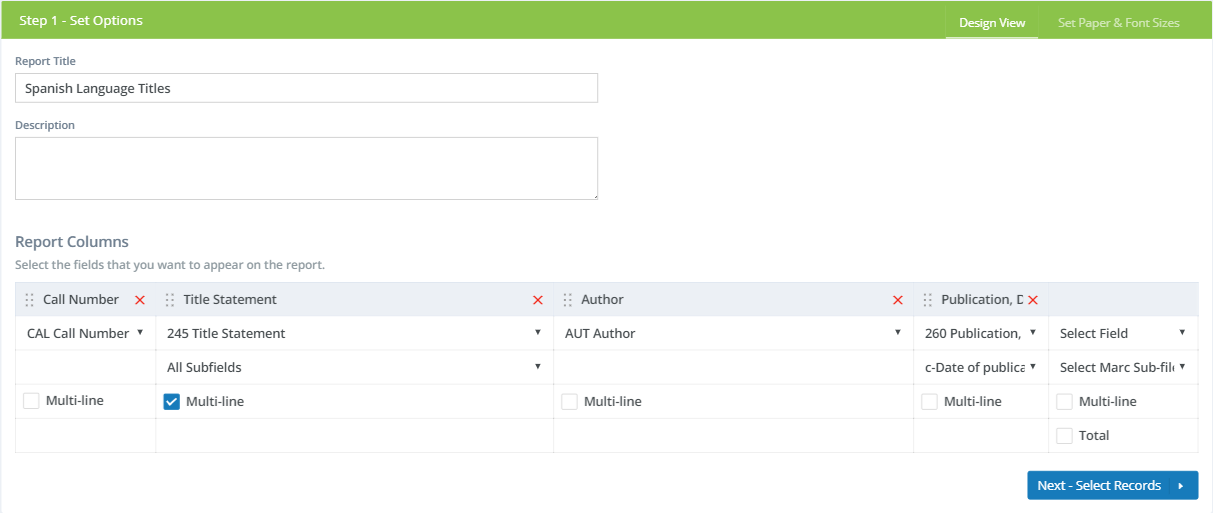
For each column, you select the following:
- Field - Click to get a drop-down list of available resource and patron fields. This list includes MARC fields, special resource fields such as "AUT" (author), holdings fields such as "BAR" (barcode), and patron fields such as "PNAME" (name).
- Subfield - If you selected a MARC field, you can select a specific subfield or "All Subfields."
- Caption - After you have selected a field, the default caption for that field will appear at the top of the column. Click the column heading to change the caption.
- Multi-line - If the field contains text data, you can check this box to indicate that you want the entire contents of the field shown on the report. If not checked, it will show only as much as can fit in one line in the width of the column.
- Total - If the field contains numerical data, check this box to indicate that you would like a total to be printed below the last line on the report.
If you include patron fields in a resource report, the patron information shown for the item is for the patron who has it on loan (if any). See Patron Fields for a list of fields.
Deleting Columns
Click the red X on any column heading to delete it.
Rearranging Columns
Click the drag handles :: on a column heading and drag to move it to a new position.
Changing Column Width
You can adjust the width of report columns by simply dragging the border line between them to the left or the right. The other columns will adjust accordingly. The columns on the report will have this same relative width sizing.
Set Paper & Font Sizes
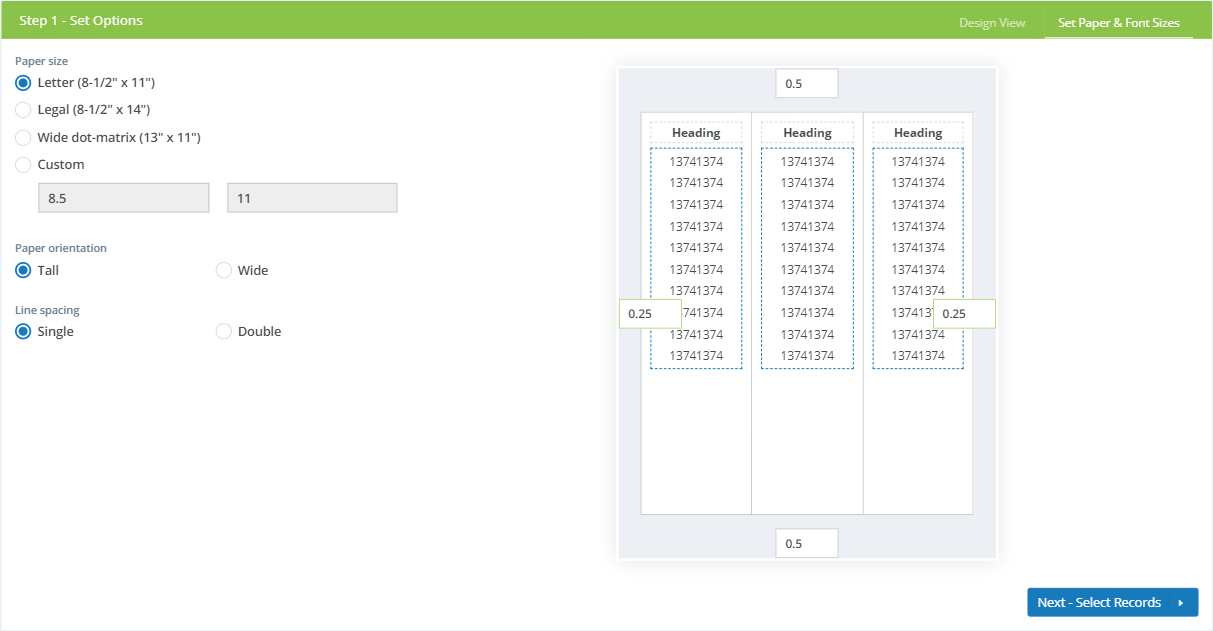
Click the Set Paper & Font Sizes tab at the top of the panel to change the paper size, paper orientation, line spacing, page margins, and fonts.
Options
-
Paper size - Select the paper size or a custom width and height.
-
Paper orientation - Select whether you want the page orientation to be Tall (portrait) or Wide (landscape).
-
Line spacing - Select whether you want Single or Double spacing between rows.
Margins & Font Sizes
Here, you can change the page margins and font sizes of the headings and report data.
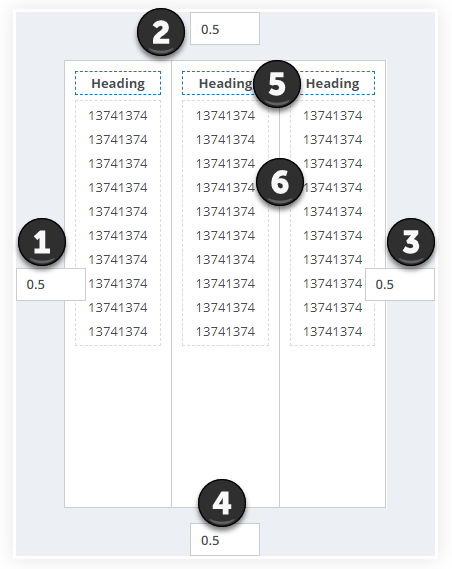
Click where indicated to edit the following:
-
1. Left Margin - Space between the left edge of the page and the report content.
-
2. Top Margin - Space between the top edge of the page and the report content.
-
3. Right Margin - Space between the right edge of the page and the report content.
-
4. Bottom Margin - Space between the bottom edge of the page and the report content.
-
5. Heading Font - Click to change the font weight and size of headings.
-
6. Report Data Font - Click to change the font weight and size of report data.