- Print
- DarkLight
- PDF
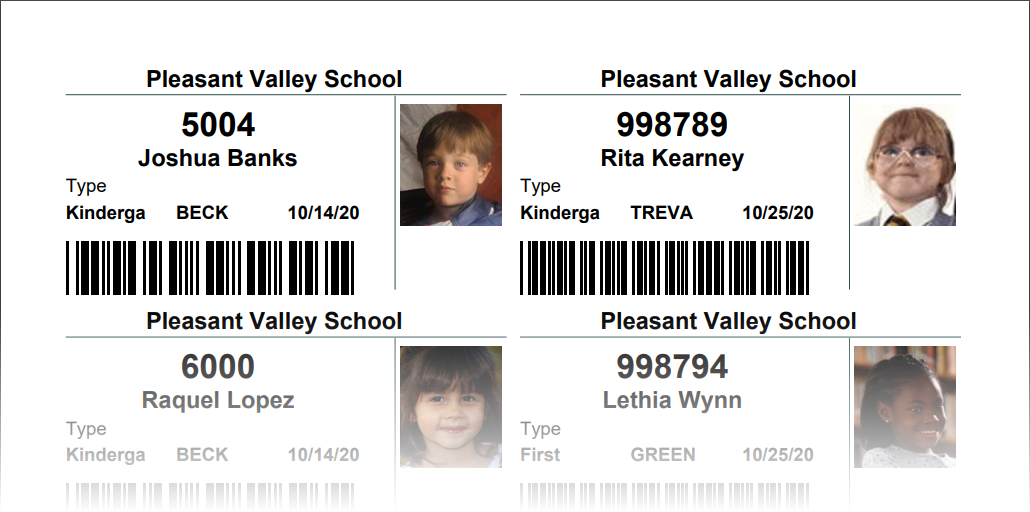
Prints patron ID cards with barcodes and optional photos. Cards are printed on Avery 5361 self-laminating ID card stock which is available from most office supply stores.

Options

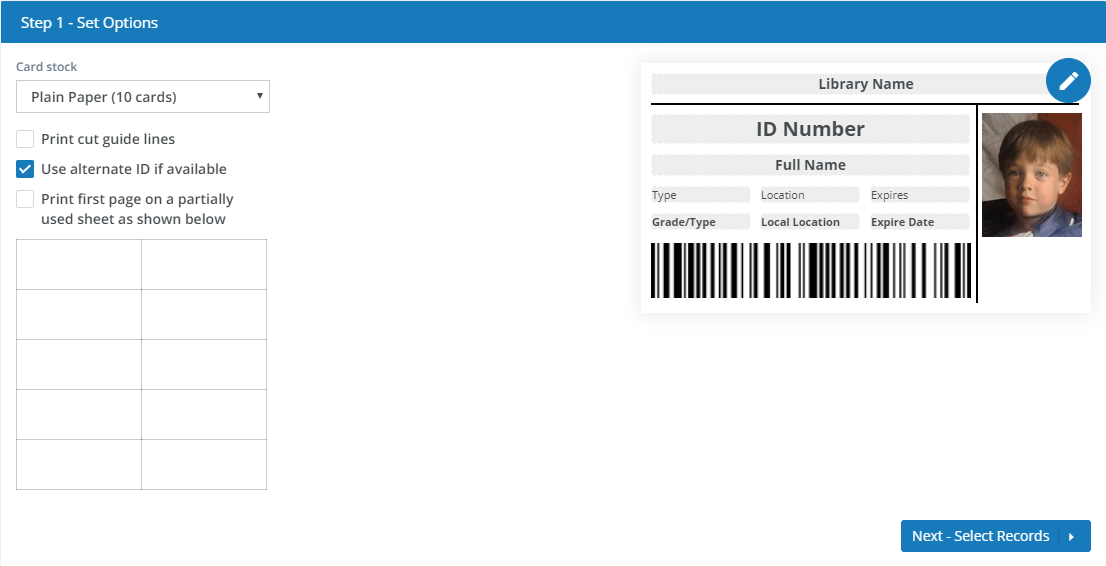
- Card stock - Select the type of card stock you will be using.
Surpass Cloud supports plain paper, Avery 5361 self-laminating ID cards, Avery 5371 business cards, and CR80 cards (requires special card printer). See Label and Card Stock for a list of suppliers and options.
Print cut guide lines - When printing on plain paper, this option prints guide lines on the page to guide you in cutting the page into individual cards.
Print first page on a partially used sheet as shown below - When printing cards, you will usually end up with a last page that is not fully used. Surpass Cloud gives you the option to use that partially printed page as the first page the next time you print cards. It will skip the "used" cards you selected (shown in gray) and start printing on the first available blank card.
Running a sheet of cards through a printer for a second time has the potential to cause damage to your printer. See your printer documentation or contact your printer manufacturer to see whether there are recommendations regarding this.
Card Layout
Click the Edit button to add, remove, or change the layout of the elements printed on the cards.


Sample Card
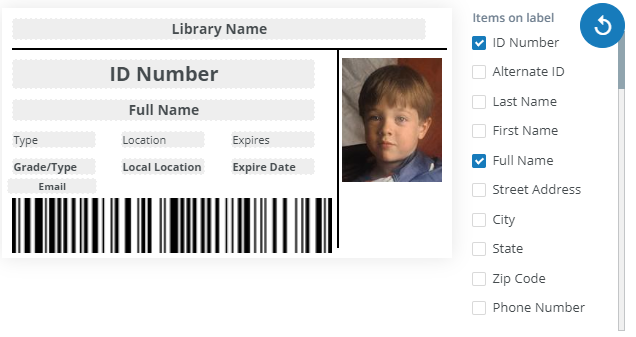
The sample card shows what will be printed on the card and where. You can drag and drop the label elements to change where they appear on the card.
Items on Card
The elements that can appear on the card are listed here. Check the box next to elements that you want to appear on the card. Un-check a box to remove an element from the card. In addition to data fields (such as Name), there are 10 text elements that can contain fixed text to be printed as captions on the labels, boxes, vertical lines, horizontal lines, and the patron photo.
Changing Font and Alignment
Double-click the element on the Sample Label (3) that you want to change. You'll see a control like this where you can change the font weight, alignment, and size.

Changing Text Elements
In addition to allowing you to edit the font and alignment, double-clicking a text element allows you to edit the text to whatever you like.
Changing Lines, Boxes, and Photo Size
Click a line, box, or photo and drag the edges to change the size.
Reset to Defaults Button

Click this button to reset the card layout to the defaults.
Selecting Records
The next step is to select for which patrons you want cards, using either Basic or Advanced record selection options. See Selecting Records for Patron Reports for detailed instructions.
To print cards for new patrons, use the Basic Record Selection, turn off App Patrons, check the the Added on or After option, and select a date. You'll get cards for patrons added on or after that date.
If your library is part of a system that has multiple locations or branches, the report will be based on the selected location at the top of the page and whether you have selected All Locations or Selected Location Only.

Viewing, Printing, and Downloading
The report can be viewed on-screen, printed, or downloaded as a PDF. See Viewing and Printing Reports.


