
Many reports for patrons have a Select Records step where you can specify which records you want to be included.
Surpass Cloud gives you two options for selecting records: a simple fill-in-the-blanks Basic option and a more-powerful Advanced option. You select which option you want from the header.

Basic Record Selection
You'll probably find that Basic record selection meets most of your needs for typical reporting and label printing. It allows you to select either all resources or resources that meet one or more conditions.
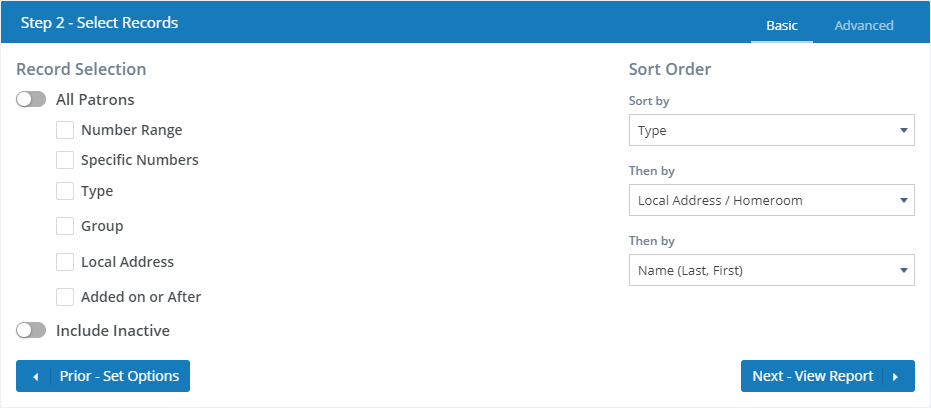
Record Selection
Use the All Patrons to specify whether you want to include all patrons (slide toggle to the right to turn on "All Patrons") or only patron records that meet one or more conditions (slide to the left). When All Patrons is "off", you have selections to make for ranges, types, etc. When it is "on", those options are hidden.
If you will be specifying conditions for record selection (not all patron records), check one or more of the boxes below and enter your criteria. If you select more than one option, only those resource records meeting all of conditions will be included.
Number Range

Enter starting and ending patron numbers for a range.
Specific Numbers
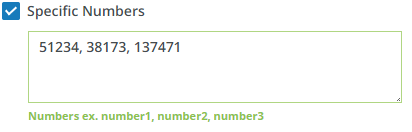
Enter one or more patron numbers separated by commas.
Type

Select a patron type from the drop-down list.
Group

Select a patron group from the drop-down list.
Local Address

Select a local address from the drop-down list.
Added on or After

Enter a date here or select a date from the pop-up calendar. Record selection will be limited to only those patrons that were added on or after this date.
Include Inactive

Slide this to the on position if you want to include patrons that have a patron type of Inactive. Typically, you would leave this off to exclude records for patrons who are no longer active in the library.
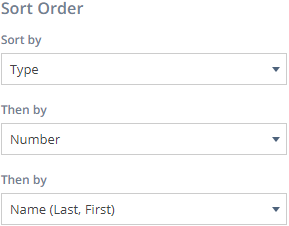
Sort Order
Here, you tell Surpass Cloud how you want the records to be sorted. In this example, the records will be sorted first by type, then by surname (for all with the same type), and finally by given name (for all with the type and surname).
Select the fields for the sort order using the drop-down list. You can select either MARC fields or Special Resource Fields.
Advanced Record Selection
Advanced record selection has more flexibility than Basic record selection, however it can also be very simple if you just need to set a condition on a field that's not an option on the Basic tab. It really shines when the conditions for your report are more complex, such as getting a report for records where you want to combine multiple conditions with an "or" condition, want records that do "not" meet a certain condition, and/or want to group conditions together in more complex ways.
Advanced record selection is covered in this tutorial video on creating patron reports on YouTube: Advanced Custom Patron Reports.
Sort Order
Just as in Basic record selection, you tell Surpass Cloud how you want the records to be sorted.

Select the fields for the sort order using the drop-down list. See Patron Fields for a list of available patron fields.
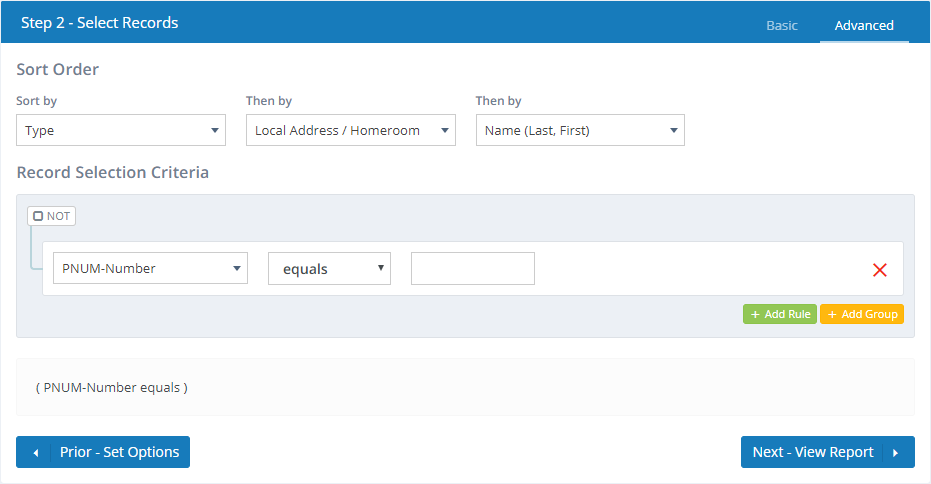
Record Selection Criteria
This is where Advanced record selection is different. Here, you add one or more condition rules.
Let's start with an example. The following rule tells Surpass Cloud that we want patron records added on or after January 1, 2020.

For each rule, you select the following:
- Field - Select a Patron Field. In the example above, the selection is the last-checked-out date, which is a Special Resource Field.
- Comparison Operator - Select from a list of comparisons such as "equals", "begins with", "is between," etc. The list of choices varies depending on the field you have selected. In the example above, the operator is "is greater than or equal to" because we want all on or after a given date.
- Value or Range - Depending on the field and comparison operator selected, this could be a simple input, two input fields (for a range), or a drop-down with a list of selections for fields such as Type or Role. In the example above, we have one date input.
Multiple Rules
To add additional rules, click the + Add Rule button. Let's add a rule to the added-after date rule from the prior example.
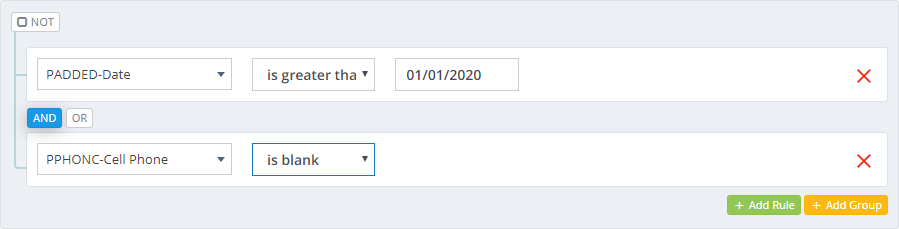
Here, we have added a rule saying that the cell phone must be blank. Note that AND is highlighted between the two rules. This means that both rules must be met for records to be selected. We could click OR to change this so that records would be selected if either condition is met (either checked out in the date range or reference category).
When we have more than one rule like this, we call it a Group. In this case, we have a group of two rules. If we added another, we would have a group of 3.
If you have multiple rules in a group, you can delete any rule except the first by clicking the red X on the right side of the rule.
Adding Groups
It is possible to create even more complex conditions by combining rules into nested groups. Here is an example of that.
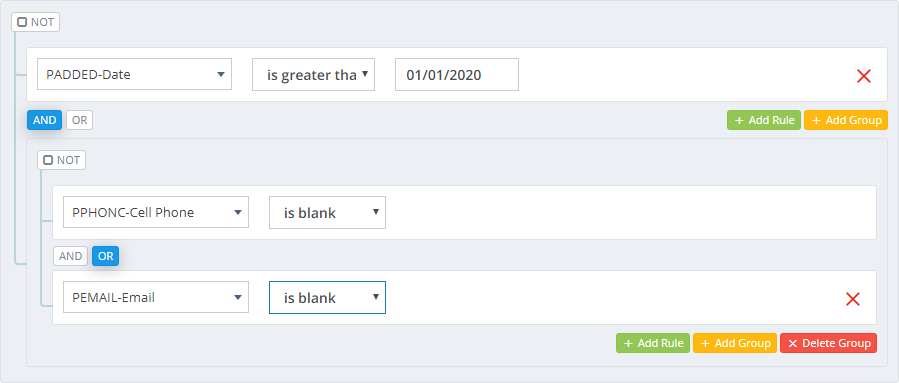
In this example, we are asking for all patron records added after January 1, 2020 AND have either no cell phone number OR no email address.
We created this by adding the first rule for Circulation Status and then clicking the + Add Group button. That created the group where we have the cell phone and email address rules joined with OR.
You can remove a group by clicking the red X Delete Group button.