- Print
- DarkLight
- PDF
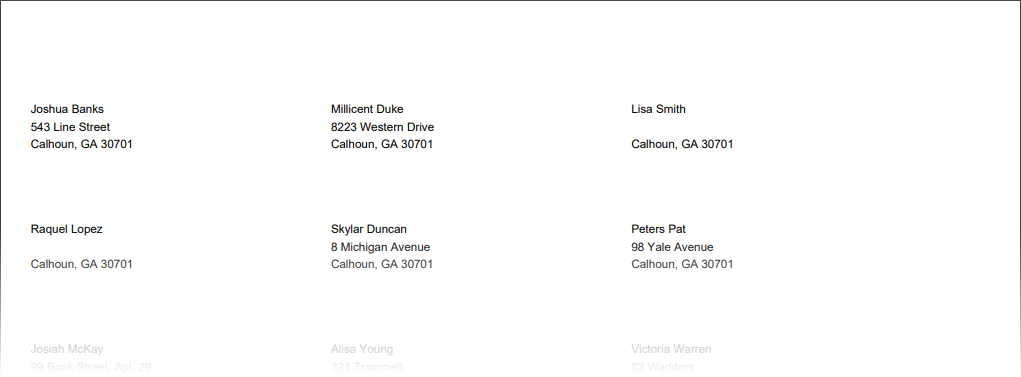
Design and print patron labels for mail, file folders, or just about any other purpose you can imagine.

Options

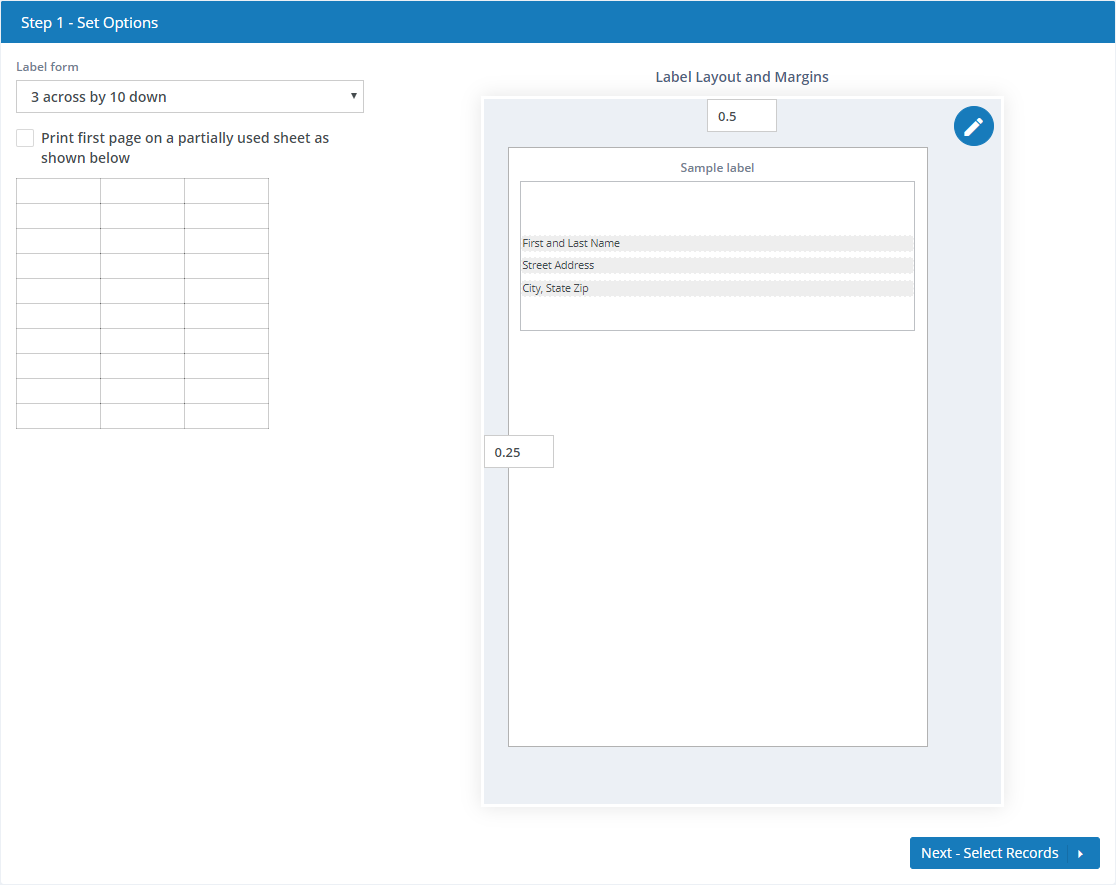
- Label form - Select the type of label stock you will be using.
Surpass Cloud supports a variety of label stock for generic patron labels. See Label and Card Stock for a list of suppliers and options.
- Print first page on a partially used sheet as shown below - When printing labels, you will usually end up with a last page that is not fully used. Surpass Cloud gives you the option to use that partially printed page as the first page the next time you print labels. It will skip the "used" labels you selected (shown in gray) and start printing on the first available blank label.
Running a sheet of labels through a printer for a second time has the potential to cause damage to your printer. See your printer documentation or contact your printer manufacturer to see whether there are recommendations regarding this.
Label Layout and Margins
Here, you can change the layout of the labels to customize them for what you want printed on them, where you want it printed, and how you want it formatted. You can also adjust the top and left margins if you find that the print is out of alignment with your label stock.

Margins
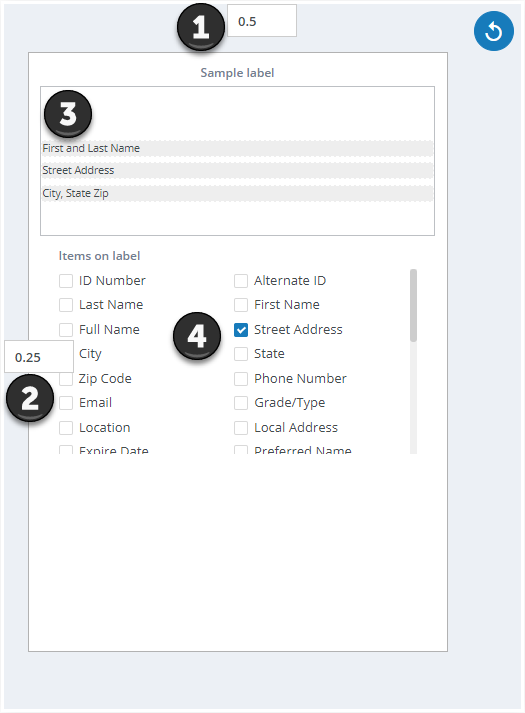
- 1. Page Top Margin - The space between the top edge of the page and the first label.
- 2. Page Left Margin - The space between the left edge of the page and the first label.
Label Layout
Click the Edit button to change the layout of the data printed on the labels

3. Sample Label - The sample label shows what will be printed on the label and where. You can drag and drop the label elements to chage where they appear on the label.
4. Items on Label - The elements that can appear on the label are listed here. Check the box next to elements that you want to appear on the label. Un-check a box to remove an element from the label. In addition to data fields (such as
Level), there are 10 text elements that can contain fixed text to be printed as captions on the labels.
Changing Font and Alignment
Double-click the element on the Sample Label (3) that you want to change. You'll see a control like this where you can change the font weight, alignment, and size.

Changing Text Elements
In addition to allowing you to edit the font and alignment, double-clicking a text element allows you to edit the text to whatever you like.
Reset to Defaults Button

Click this button to reset the margins and label layout to the defaults.
If this is the first time you have printed using this label stock and printer, test first by printing one page on a plain sheet of paper. Then, lay the printed sheet on top of a page of labels and hold up to the light to check the alignment.
Selecting Records
The next step is to select for which patrons you want labels, using either Basic or Advanced record selection options. See Selecting Records for Patron Reports for detailed instructions.
If your library is part of a system that has multiple locations or branches, the report will be based on the selected location at the top of the page and whether you have selected All Locations or Selected Location Only.

Viewing, Printing, and Downloading
The report can be viewed on-screen, printed, or downloaded as a PDF. See Viewing and Printing Reports.


