

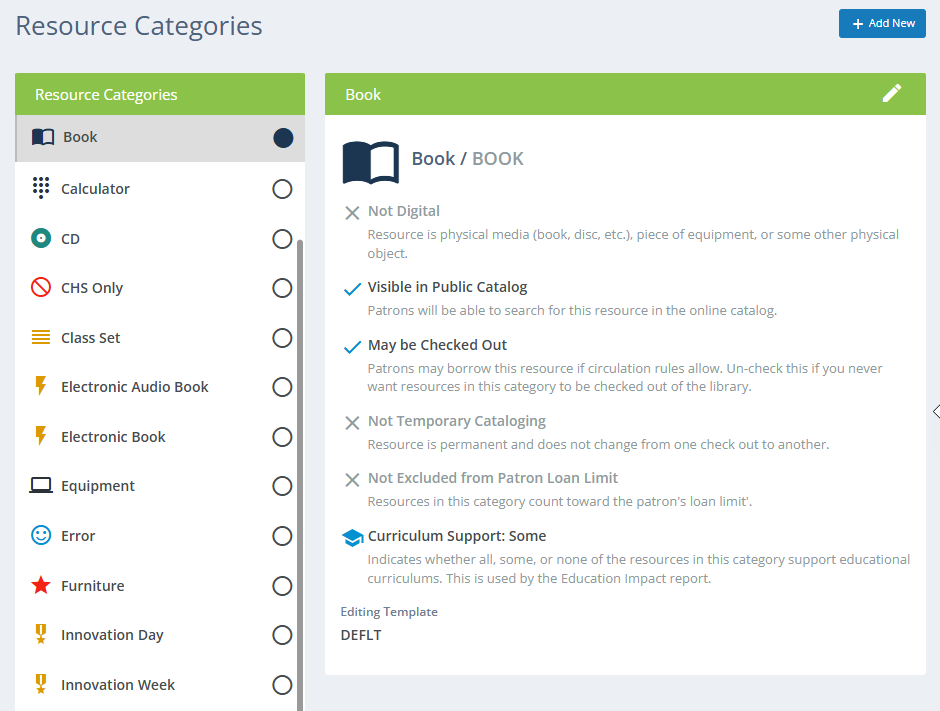
The Resource Categories feature in Settings allows you to manage your collection's categories. You'll define each category for your collection, and set one to be the default that is automatically used for resources that haven't been assigned to any category. You can also make settings that will control how items in each category are cataloged and displayed, such as colorful icons to associate with each category and cataloging templates to use.
A video tutorial on creating resource categories is available on YouTube: Creating Resource Categories
A video tutorial on excluding resource categories from patron loan limits is available on YouTube: Exclude Categories from Patron Loan Limits
@(Info)()(For more information about Resource Categories, see Resource Categories in the Getting Started section.)
Adding and Editing
See Adding and Editing Records for more information on adding and editing records in Surpass Cloud.
Form Fields
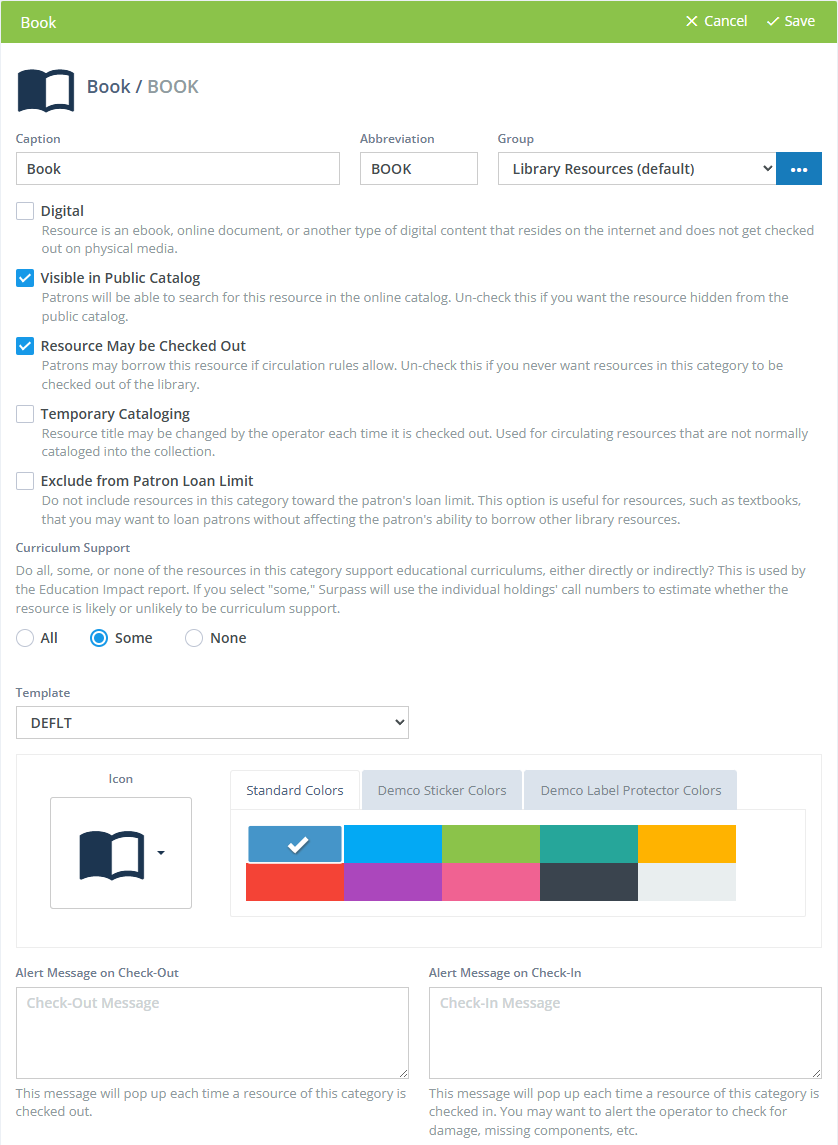
- Caption - The name of the category. Use whatever name makes sense to you.
- Abbreviation - This a shorter form of the full caption. It can even be the same as the caption. This is used in places where the full-length caption might be too long to display.
- Group - The group to which this category belongs. By default all categories are in the "Library Resources" group, but you can create your own groups by clicking the
...button on the right side of this input. You might, for example, want to group all categories for AV media (DVDs, CDs, etc.) into an "AV Media" group, or all printed media categories into a "Print Media" group. If you have resources in groups, they will be organized in left-side list under group headings. Future updates to Surpass Cloud will use Resource Groups in certain statistical reports. - Digital - Check this box if the resources in this category are digital, such as e-books and online documents. Digital content is handled differently from physical content. For example, it is not available for regular check out, is not part of the physical inventory count, and holds cannot be placed on it. E-book providers typically handle check out, and check-in through their own systems.
- Visible in Public Catalog - Check this box if you want resources in this category to appear in the online public access catalog (OPAC). You might not want certain types of cataloged resources, such as textbooks, to be visible in the public catalog. You would put those in a category that has this option switched off.
- Temporary Cataloging - If you have resources that are not checked out often enough to catalog permanently, such as periodicals, you can add a number of "temporary" resources and put them in this category. These resources may consist of nothing more than a folder or envelope into which you place the item that is being checked out.
- Exclude from Patron Loan Limit - Enable this option to prevent items in the selected category from counting toward a patron’s overall loan limit. This setting is particularly useful for resources such as textbooks, course reserves, or other materials that you want patrons to access freely without reducing their borrowing capacity for other library items.
- Curriculum Support - Determines whether all, some, or none of the resources in this category support educational curriculums, either directly or indirectly? This is used by the Education Impact report. If you select "some," Surpass will use the individual holdings' call numbers to estimate whether the resource is likely or unlikely to be curriculum support.
- Template - Select the editing template form you want to use when adding or editing resources in this category. See Settings : Resources : Editing Templates.
- Icon - Select the icon graphic and color you want to represent items in this category.
- Alert Message on Check-Out - The text here, if any, will be shown to the user when checking out resources in this category. For example, if the resource being checked out is a kit, you might want to remind the user at the circulation desk to make sure that none of the components are missing.
- Alert Message on Check-In - Just as with the message shown to the user when checking out, you can use this to have a message that is shown to users when items in this category are returned and checked in.
@(Info)(Category Icons)(Surpass Cloud uses Material Design icons for categories. You can see a full-page list of all Material Design icons here: https://material.io/resources/icons.)
Default Category
One category is designated as the default to be used when adding new resource holdings. You can always change the category, but having a default value that's set to the most-common category for the resources you are adding can make things a little easier.
Set the default category by clicking the circle to the right of the category name in the list. The one category with the solid circle next to its name is the default.
Deleting Resource Categories
To delete a resource category, click the Edit (pencil) button in the upper right corner of the panel then click the Delete button at the bottom of the panel.
You will not be able to delete the category if it is set to be the default category (see above) or if there are resource holdings within that category. You should first move those holdings to a different category.
A video tutorial on this deleting categories is available on YouTube: Deleting Resource Categories