A video tutorial on setting up Self-Check is available on YouTube: Setting Up Self-Check
Most of Self-Check's features and settings are controlled using the Settings : Circulation : Self-Check page in Surpass Cloud Admin. There are two settings that are controlled from within Self-Check itself:
- Theme - Self-Check has a light and a dark theme. Because this affects visual appearance of Self-Check, this setting is made from within Self-Check so that you can see the differences between the two themes.
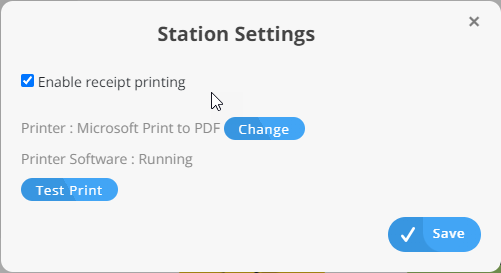
- Receipt Printing - Because it involves connection to printers configured on individual computers, you use Self-Check to set up printing at each computer where it will be used.
Accessing Self-Check Settings
Features that affect the visual appearance of Self-Check and those related to specific Self-Check stations are controlled from within Self-Check itself.
These settings are accessible only to users who have Launch Self Check permission in their security role. See Settings : Security : Roles. If you role allows you to launch Self-Check, it will also allow you to change settings from within Self-Check.
Log In (Again)
Accessing Self-Check's settings might feel as if you're logging in twice. You provide your credentials the first time to start Self-Check if it is configured to be started only by authorized users. Launching Self-Check doesn't log you in as a patron; it just starts the app so that library patrons can use it.
After launching Self-Check, it is ready for patrons to use. They must log in to access their accounts, check in, check out, etc. Just as patrons must log in to access features related to their accounts, you must also log in to access your account and the Settings features available to you.

Click the Login button and enter your credentials to log in.
Enter the Settings Mode
When you're logged in using a patron account authorized to edit settings, you'll see a button with a spinning gear icon the right side of the page. This is the Settings button. Click this button to enter Settings Mode.

Once in Settings Mode, you'll see additional buttons:
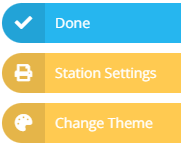
-
Change Theme - Change the visual appearance of Self-Check.
-
Station Settings - Set up the receipt printer to be used with Self-Check on this computer.
-
Done - Click this button when you have finished making changes to settings.
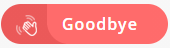
Don't Forget to Log Out!
When you are finished working in Self-Check, click the Goodbye button to log out.