

The Resources View page is where you search for, view, add, and edit library resources such as books, digial media, equipment, etc.
How To
- Search for Resources
- Add New Resources
- Edit Resources
- Add and Edit Holdings
- Customize the Resource List
- Add Resources to Collections
- Add Website, Video, and Other Links
The Resource View Page
Like many pages in Surpass Cloud, Resources View uses a split-page design with a list of resources on the left and details for the selected resource on the right. The List and Detail panels can be expanded individually to the full width. See Getting Around for more about how to use split pages.
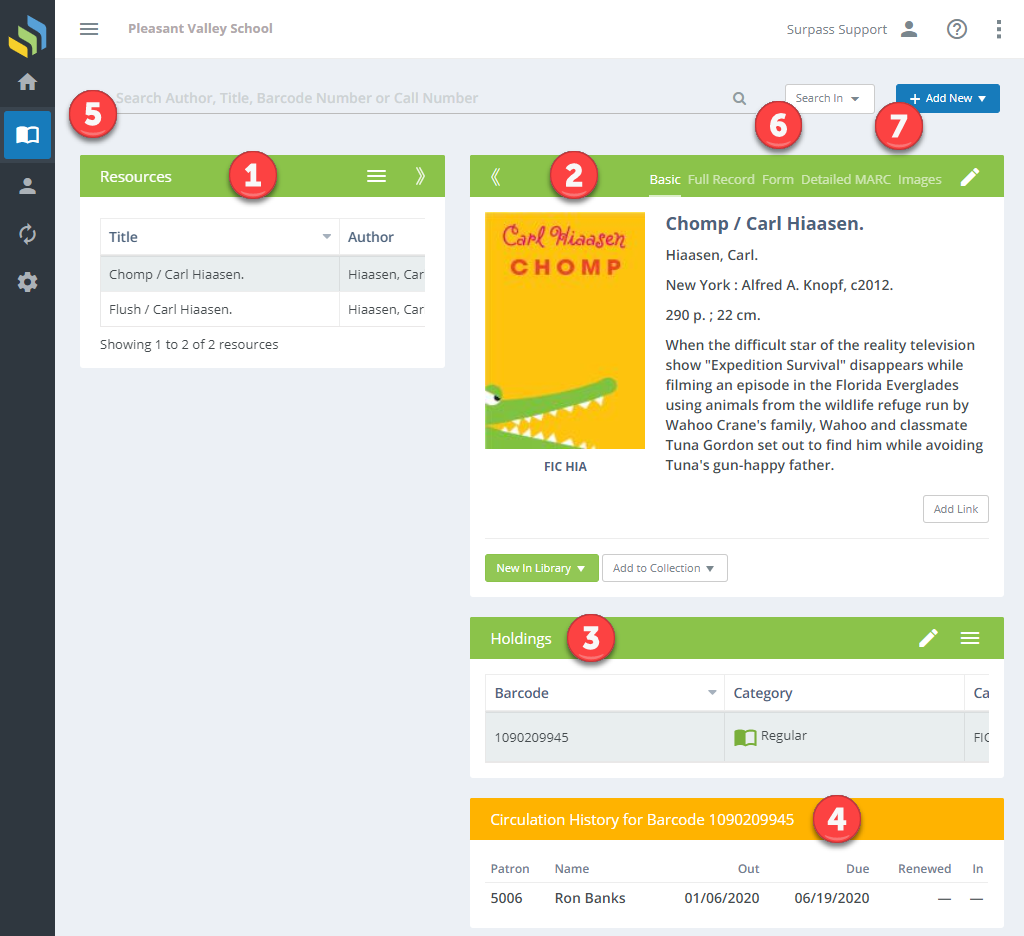
1. List Panel
The List panel shows the list of resources found after you perform a search. Select a record from the list to see the record in the Detail Panel. See Resource List Options.
2. Detail Panel
The Detail Panel shows detailed information on the selected resource and is where you will edit the resource to make any changes.
Use the tabs at the top of the detail panel to switch between the different views: Basic, Full Record, Form, Detailed MARC, and Images.

Basic
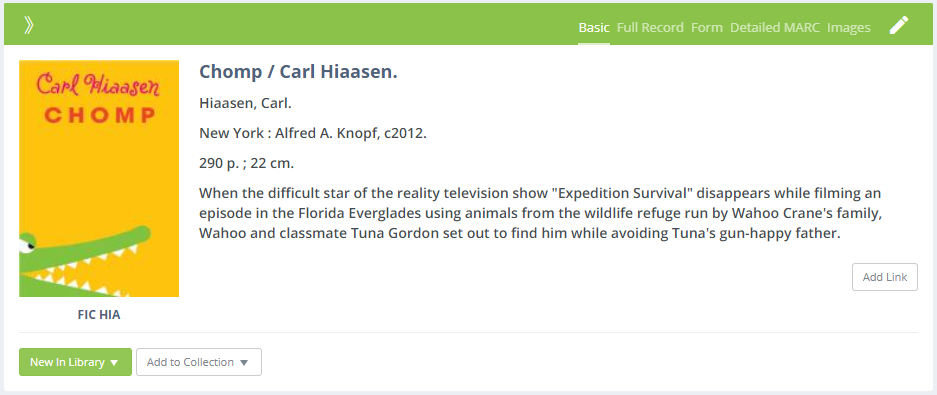
The Basic detail view shows the cover image (if available), title, author, publisher, dimensions, and summary. It also shows the call number for the selected holding from the Holdings panel, web and other links associated with the resource, and colored buttons representing the Resource Collections to which the resource belongs.
Full Record
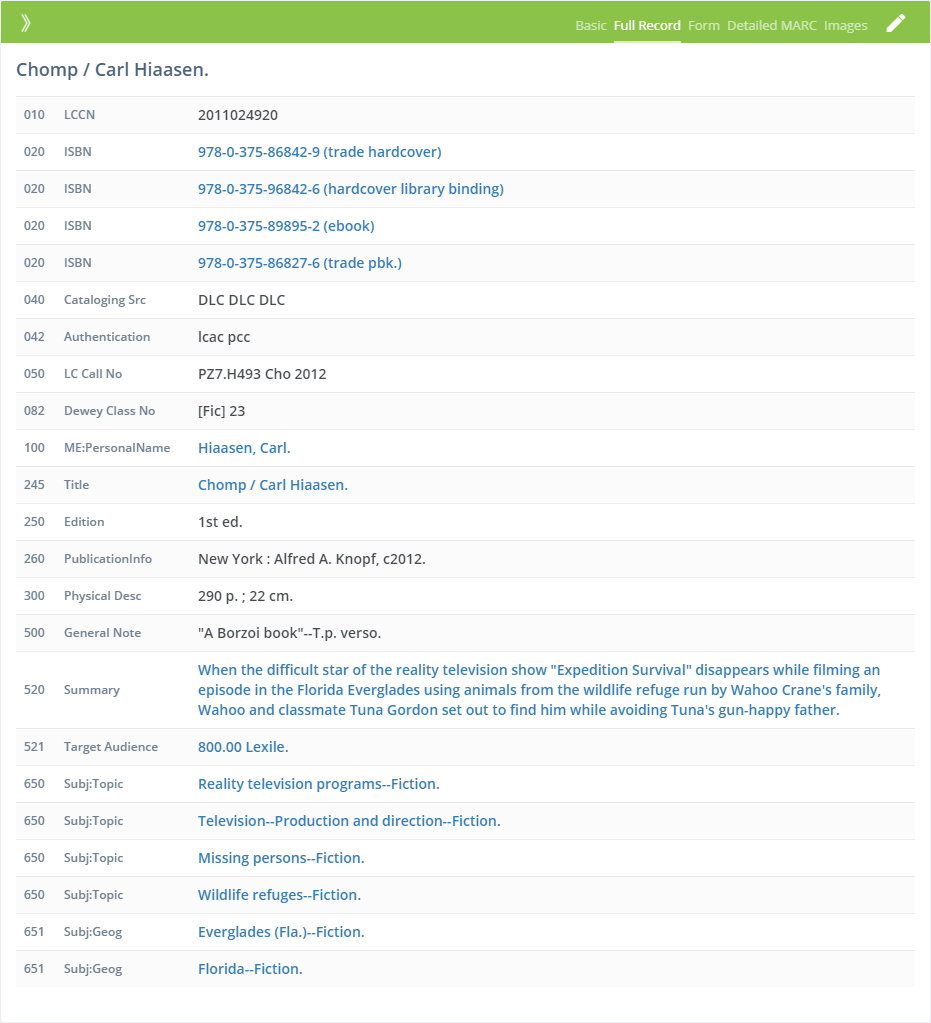
The Full Record detail view is a simplified view of the full record with all MARC fields shown. Use the Detailed MARC view to see all of the technical details, including indicators, with the MARC fields broken down into subfields.
The blue values in a Full Record view are quick links to searches. For example, clicking the author name will search for all titles with that same author, clicking a subject will find all titles with that same subject, etc.
Form
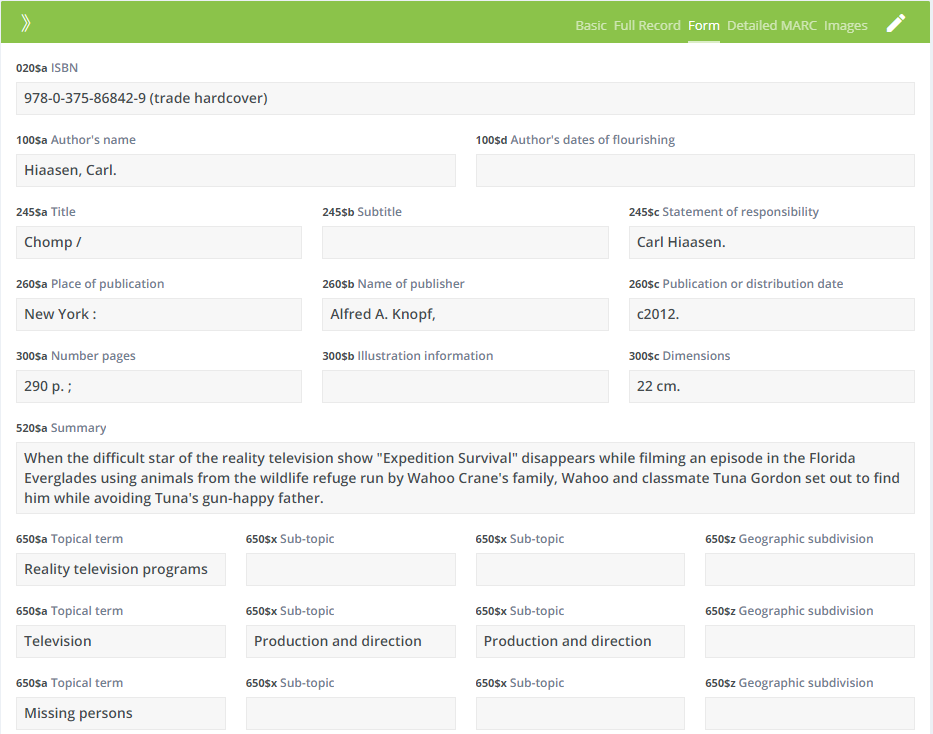
The Form view shows selected fields of the MARC record laid out in a user-friendly form. Form templates are associated with the holding's Circulation Category and can be customized on the Settings : Resources : Templates page. Form templates are especially helpful when adding new resource records.
Detailed MARC
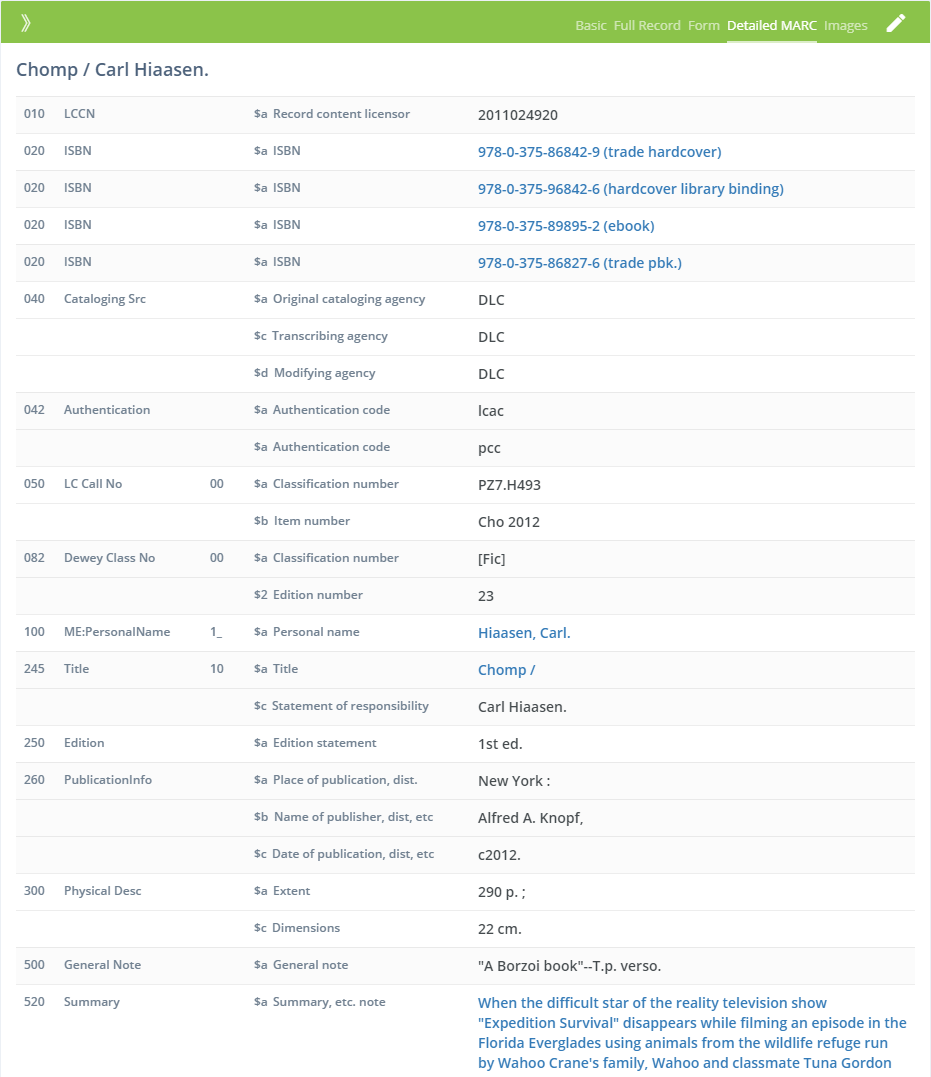
The Detailed MARC view shows the most details of the MARC record, including indicators and subfields.
The blue values in a Detailed MARC view are quick links to searches. For example, clicking the author name will search for all titles with that same author, clicking a subject will find all titles with that same subject, etc.
Images
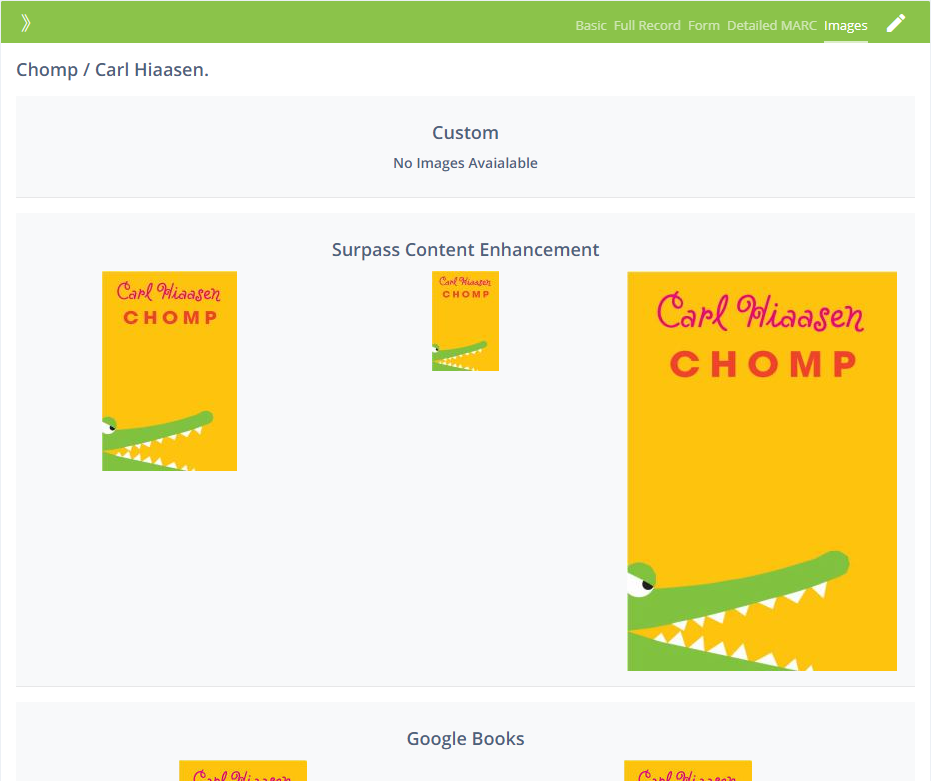
The Image view shows images associated with the title, from various sources and in different sizes. These images are used throughout Surpass Cloud and are especially useful in the public access catalog, Surpass Cloud OPAC.
Surpass selects the best-fit (based on required size) image from the following sources in this order of preference:
- Custom - If you have uploaded a custom image (see Resource Custom Images Editor, this image will be used throughout the software.
- Image Links in MARC - MARC records sometimes include links to external sources for images. This is often the case with MARC records from ebook vendors.
- Surpass Enhanced Content - The optional Enhanced Content subscription usually provides the best-quality images and has the largest repository of images.
- Google Books - Google Books images are free and the number of images available is large and growing, but it is more limited in scope than Enhanced Content.
- Open Library - Like Google Books, its images are free but limited in scope.
3. Holdings Panel

The Holdings Panel lists your library's holdings (copies) for the resource. If your library has 5 copies of a title, they will be listed here. Each holding has a barcode, call number (usually the same for all), a Circulation Category (usually the same for all), the status (on loan, in library, etc.), as well as additional fields such as the acquisition date, the fund used to purchase it, and more. You can configure which fields are shown in this list using the menu button on the Holdings Panel header.
The Holdings Panel is also where you add new holdings (copies) and edit existing ones. See Adding and Editing Holdings to learn more.
Selecting Specific Holdings
If there are multiple holdings records, the selected record is the one used for the call number shown on the Basic view of the Detail Panel and for the data shown on the Circulation History panel.
4. Circulation History Panel

The Circulation History panel lists, in decending date order, the details of each loan (check out) of the holding currently selected in the Holdings Panel.
You can control whether the Circulation History panel is shown when viewing resources using the settings on the Resources View Sidebar.
5. Search Bar

This is where you search for library resources. See Searching for Resources.
6. Search-In Button

Click this button to access search options and change which field(s) you want to search. See Searching for Resources.
7. Add New Button

Click the Add New button to add a new resource. You can add resources by entering all of the cataloging information yourself, either by filling in a form or constructing a full MARC record; or you can add resources by copying cataloging information from from the Library of Congress and other major libraries. See Where to Get Resource Records and Adding New Resource Records.
8. Circulation Alerts Panel

The Circulation Alerts panel allows you to add a alert message on Check-Out or Check-In of a resource.
custom
You can control whether the Circulation Alerts panel is shown when viewing resources using the settings on the Resources View Sidebar.