

Click the Add New or Edit (pencil) button on the Patrons View to add a new patron record or edit the existing patron record shown.
See Adding and Editing Records for more information on adding and editing records in Surpass Cloud.
Add Options
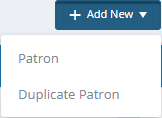
When you click Add New to add a new patron, you have two options:
- Patron - Add a new patron starting with a blank form.
- Duplicate Patron - Add a new patron using the currently shown patron information as a starting point. This is helpful when you are adding patrons that are a part of the same household and share the same address, phone number, etc., and for other cases where you might be adding records for patrons that share a lot of the same information.
Form Fields
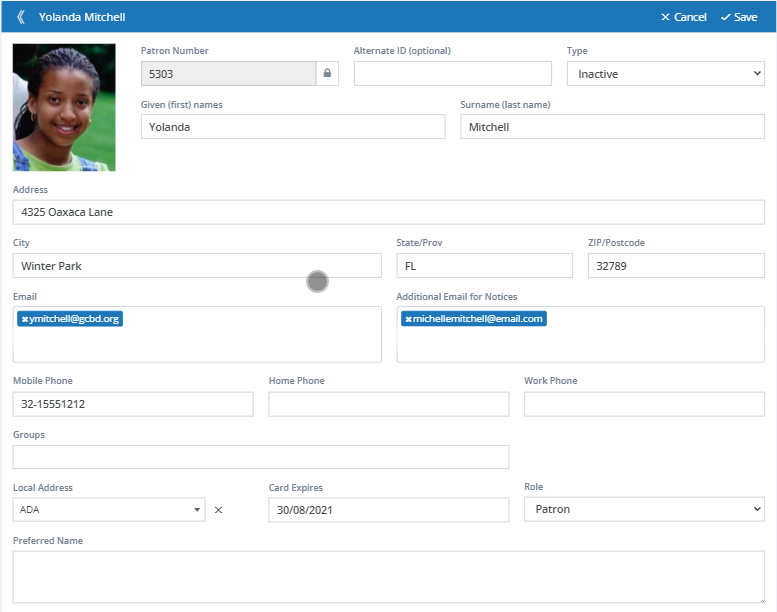
- Patron Number - The patron's number, which can be up to ten digits long. Surpass uses this number to track all patron activity. When you print patron library cards or barcode labels, this is the barcode number. When adding patrons, you can assign your own number or leave this blank to have Surpass automatically assign a number for you. If your are in a school library, you might want to use your school's student ID number. When editing existing patron records, the field is locked so you don't change it unintentionally. Click the lock icon to un-lock the field if you want to change the patron number.
- Alternate ID - You may assign a secondary ID to patrons to use for circulation. The alternate ID can be up to 15 characters long and may contain numbers (0-9) and letters (A-Z). Alternate IDs must be unique – they must not conflict with existing patron numbers or other alternate IDs. Alternate IDs are useful when you want to use patron IDs that contain letters or that are longer than the 10-digit length of patron numbers. This is especially useful to organizations that already use a specific ID numbering system.
- Type - Select the Patron Type.
- Given (first) names
- Surname (last name)
- Address
- City
- State/Prov - State or province.
- ZIP/Postcode - ZIP code or postal code.
- Email - Patron's email address. This is is used for sending receipts, notices, and lists emailed from the OPAC. The patron can also use the email address and password to log into Surpass Cloud apps. You can enter more than one email address if you want to send to multiple addresses for the patron.
- Additional Email for Notices - An email address where you would like to send a copy of overdue and other notices, in addition to the patron's primary email address. This could be a parent or guardian. Only notices are sent to this email address; not receipts, password changes, or other emails. You can enter multiple email addresses here.
- Mobile Phone
- Home Phone
- Work Phone
- Groups - Click to select from a list of existing Patron Groups or create a new one by typing its name.
- Home Library - In a multi-branch library, this indicates the "home" location of the patron. You can select the location from a drop-down list.
- Local Address - The patron's internal address within the location. This is often used in schools to indicate a patron's classroom, or in other organizations to indicate department. Local address is often used in reports for sorting and conditions.
- Card Expires - The date the patron's library card and borrowing privileges expires. This field is shown only if your library is set up for "library cards have expiration dates" (see Settings : Patron : General.
- Role - The patron's role within your library. The default value for this is based on the Patron Type. For more information on roles, see Security Roles.
- Custom Fields - Your library can define up to 10 Custom Fields for patron records. Those fields appear below the standard fields.
Welcome Your New Patron
You might want to send your new patron a Welcome Email with information about your library, how to access the OPAC, and login credentials. Click the "hamburger" menu on the patron panel and select Send Welcome Email.
