- Print
- DarkLight
- PDF
This feature is not available in Cloud Small or Cloud for Congregations.
Student Information Systems (also known as Student Management Systems) are employed by many schools to track student information and coordinate communication between teachers and staff. Many SIS use a roster data standard called OneRoster. If your SIS uses OneRoster, it can be configured to work with Surpass Cloud so that any changes made to a student record in the SIS is reflected in their patron record within Surpass.
Setup
OneRoster configuration can be found under Settings: Patrons: OneRoster. You will be prompted to add in host credentials, such as Host, OAuth URL, Client ID, and Client Secret. If you do not know these details, please contact your SIS.
Note: The OAuth URL is used to authenticate the system's connection to your SIS. In most cases, this can be left blank and the system will autofill the correct address. However, if your patron data is coming from a different endpoint, you will need to specify the location here.
Sync
Select sync schedule option. If Recurring Schedule is selected, the schedule will need to be set.
Mappings
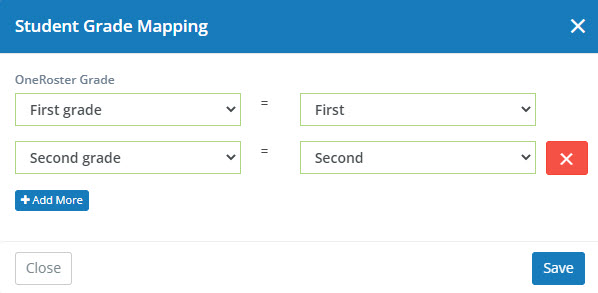
Once OneRoster host credentials have been added, you can map fields between the SIS and Surpass. All found mapping fields must be configured. The fields to map are:
• Grade to Patron Type
• Org to Location
• Role Mapping
• Identity Mapping

Finding Client ID/Secret & Identity Mapping
Below is where you can find the fields for User Name, Source ID, and Identifier in various SIS that support OneRoster, as well as where to find the Client ID and Client Secret.
PowerSchool
- User Name: "Users" table, "username" or "email" field
- Source ID: "Students" or "Staff" table as "student_id" or "staff_id".
- Identifier: "Students" or "Staff" table as "external_id" or "local_id".
- Email: "Users" or "Students" table as "email".
- Client ID and Client Secret: PowerSchool Developer Tools. More information can be found at https://support.powerschool.com/article/77562
1. Log in as an admin.
2. Navigate to System Settings > Developer Tools or API Management.
3. Create or access API credentials.
Infinite Campus
- User Name: "Person" or "User" table as "username" or "email".
- Source ID: "Person" table as "person_id".
- Identifier: "Person" table as "local_person_id" or "state_person_id".
- Email: "Person" table as "email".
- Client ID and Client Secret: Infinite Campus API Settings. More information can be found at https://kb.infinitecampus.com/help/api
1. Log in as an admin.
2. Go to System Administration > API Settings.
3. Register a new application or access existing credentials.
Skyward
- User Name: "Users" or "Login" table as "username" or "email".
- Source ID: "Students" or "Staff" table as "student_number" or "staff_number".
- Identifier: "Students" or "Staff" table as "district_id" or "state_id".
- Email: "Users" or "Students" table as "email".
- Client ID and Client Secret: Skyward API Management. More information can be found at https://support.skyward.com
1. Log in as an admin.
2. Go to Administrator Access > API Management or Third-Party Integrations.
3. Create or access API credentials.
Aeries
- User Name: "Users" or "Students" table as "email" or "login".
- Source ID: "Students" table as "student_id".
- Identifier: "Students" table as "perm_id" or "state_id".
- Email: "Users" or "Students" table as "email".
- Client ID and Client Secret: Aeries API Configuration. More information can be found at https://support.aeries.com
1. Log in as an admin.
2. Go to Admin Settings > API Configuration or API Management.
3. Register a new application or access existing credentials.
Aspen
- User Name: "Person" or "User" table as "login_name" or "email".
- Source ID: "Students" or "Staff" table as "student_id" or "staff_id".
- Identifier: "Students" or "Staff" table as "local_id" or "external_id".
- Email: "Person" or "User" table as "email".
- Client ID and Client Secret: Aspen API Management. More information can be found at https://support.myfollett.com
1. Log in as an admin.
2. Go to Admin Tools > API Management or Integration Settings.
3. Register a new API client or access existing credentials.
Fields to Update
Select what fields you want to update in surpass side when synchronization occurs. Name, Email, and Grade are mandatory.

Execution
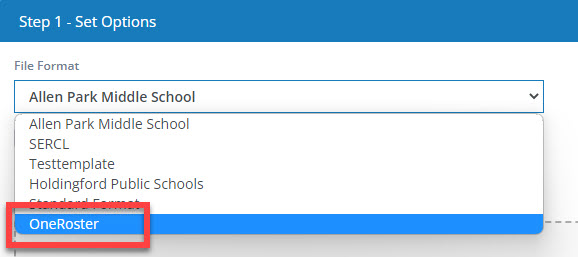
If the Recurring schedule option has been selected, the synchronization between systems will occur automatically per the schedule you have set. If using the On Demand option, you can manually perform synchronization by going to Patrons > Import > Patrons and selecting OneRoster from the dropdown menu.

Even if you have selected recurring schedule you can still perform on demand sync from patron import page.


