- Print
- DarkLight
- PDF
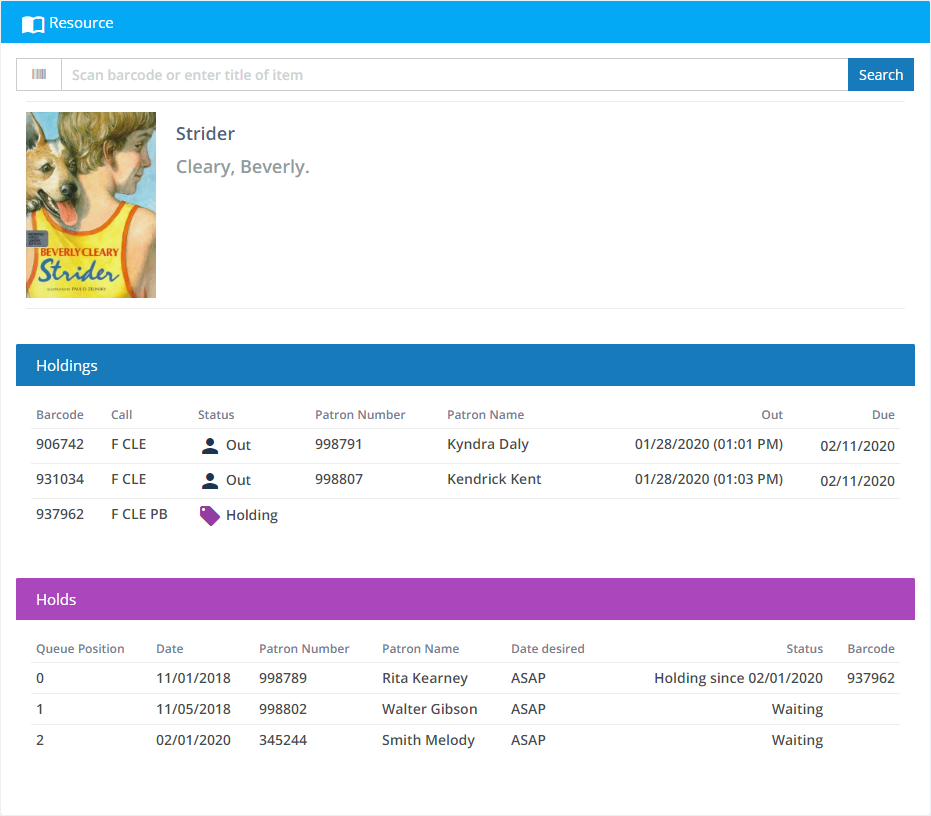
Click the Resource button to check the status of a resource, including a list of resource holdings, and any holds.

Select a Resource
Select a resource by scanning a barcode, entering a barcode number, or searching by title. See Selecting a Resource for detailed instructions.

After you have selected a resource, you'll see three panels:
Resource Information - Basic information for the resource (title, author, and cover image).
Holdings - A list of the library's holdings for this resource and the status of each. Click a holding to see more detail and have the opportunity to Check In or Renew (if on-loan) or declare a resource to be lost.
Holds - The holds queue for the resource. From here, you can click a hold to cancel it or to change its order in queue.
Check In or Renew
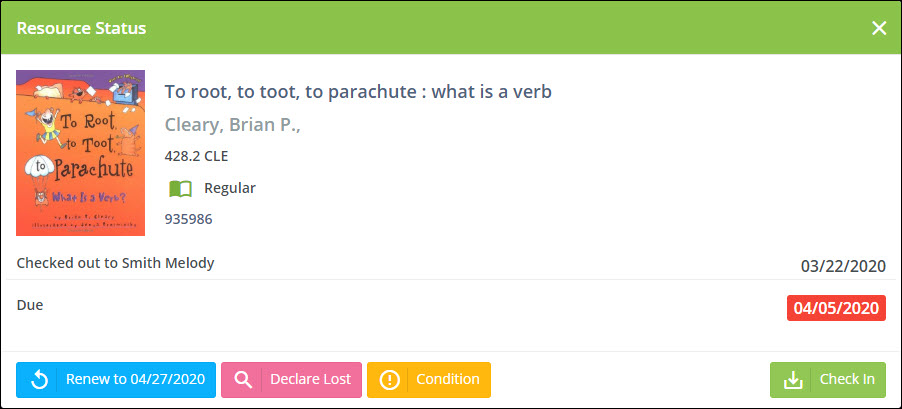
Click a holding in the Holdings list to see more detail for the holding. If it is checked out, you can check it in or renew it from here by clicking Check In or Renew
Declaring Lost
If you have determined that a resource is lost, you can indicate that by selecting the resource from the list, clicking it to see the Resource Status detail, and then clicking Declare Lost.
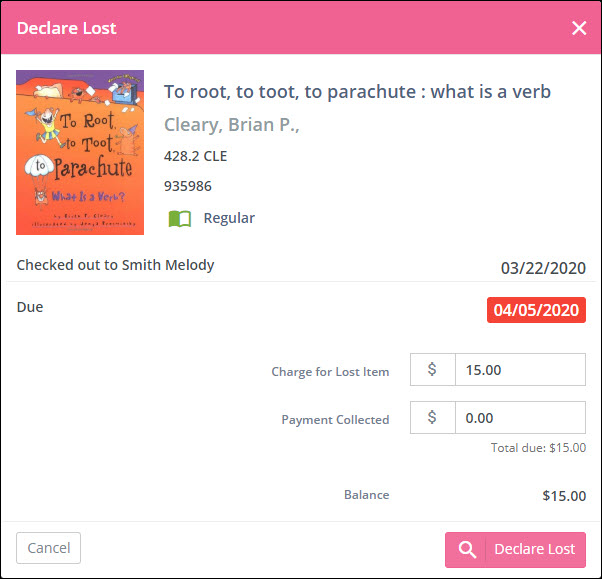
If the resource is checked out to a patron, you will be asked for the following (otherwise, you just confirm that it is lost):
Fine Amount - If the resource is overdue and a fine is owed, enter the amount to charge here. The default is the fine based on Circulation Rules.
Charge for Lost Item - The amount to charge the patron for the lost item. The default will be the cost of the item as shown on the resource's holding record on the Resources : View page.
Payment Collected - The amount (if any) that the patron has paid you for the fine and lost item.
When you click the Declare Lost button here, the status of the resource changes to Lost and the charges and payments (if any) are recorded in the patron's ledger.
Declaring Found
If a resource has been declared lost and has subsequently been found, you can return it to your collection by declaring it found. Click the resource with the Lost status in the Holdings list to see the Resource Status detail, then click Declare Found.
If the resource was not charged to a patron when it was declared lost, you will be asked to simply confirm that it has been found, otherwise, you'll be asked to supply a little more information.
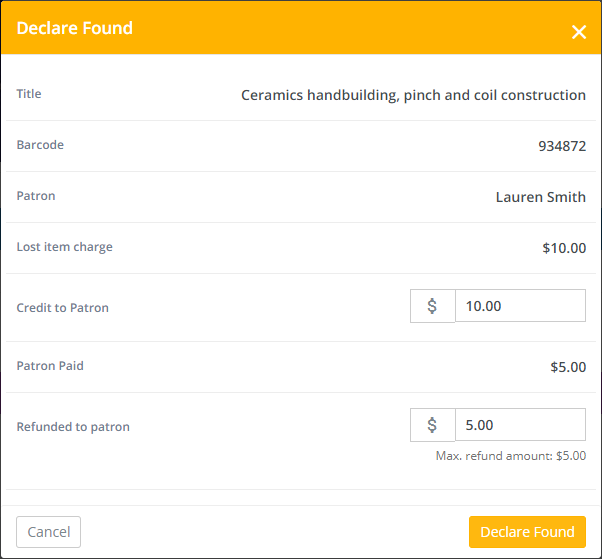
Credit to Patron - If you want to give the patron partial or full credit for the amount that was charged to their account for the lost resource, enter that amount here.
Refunded to Patron - If you are giving a patron credit and the patron has paid you, have you given money back to the patron? If so, enter that amount here. Otherwise, it will appear as a credit on the patron's account.
Resource Condition and Damage
If you notice damage on an item, you can check to see whether that damage was previously noted and, if not, make a note of it. If you determine that the damage was caused by the last patron who borrowed it, you can also indicate that patron was responsible and, optionally, charge the patron for the damage. Click the Condition button to view the item's condition and damage history.
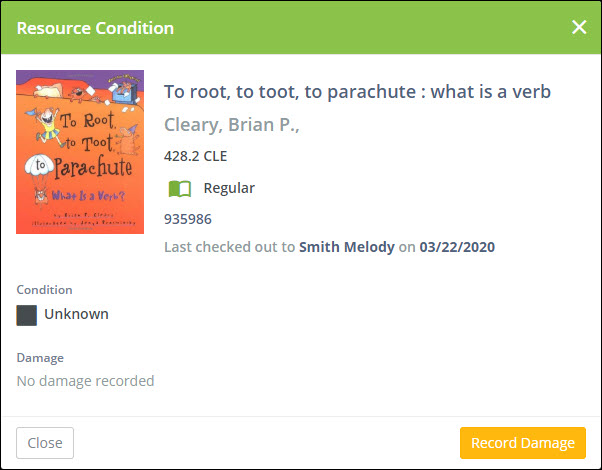
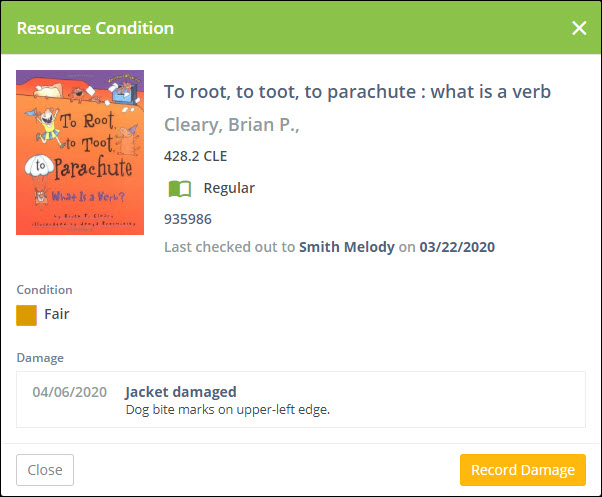
The information shown includes the patron (if any) to whom it was last checked out, the date it was last checked out, the currently recorded condition, and a list of any damages that have been recorded.
Record Damage
Click the Record Damage on the Resource Condition dialog to record any damage that you have discovered.
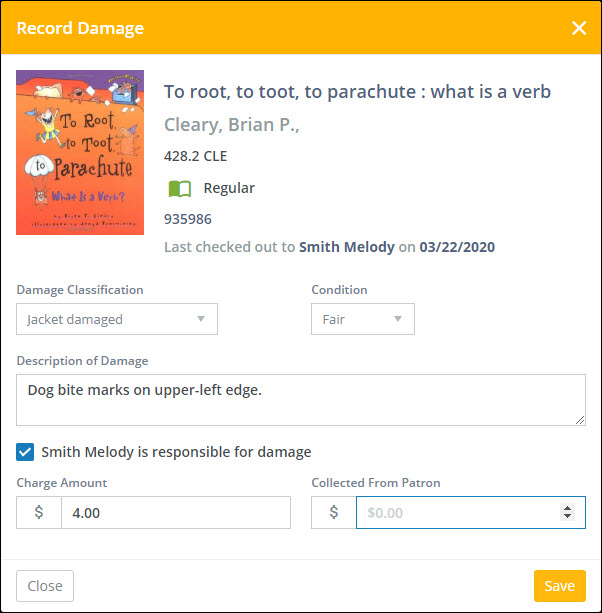
Damage Classification - Select the type of damage. You can add to or edit the list of available damage classifications in Settings : Resources : Damage Classifications.
Condition - Select the condition. You can add to or edit the list of available conditions in Settings : Resources : Condition Classifications.
Description of Damage - Enter optional text to describe the damage.
Patron is responsible for damage - Check this box if you want to record that the patron who last had this resource on loan as responsible for the damage. This option does not appear if the resource has never been checked out. If you check this box, you will be able to enter the amount to charge and the amount you have collected from the patron in the next two inputs.
Charge Amount - The amount to charge the patron (if any). The initial value you see here is based on the default charge defined for the selected Damage Classication.
Collected from Patron - The amount you have collected from the patron (if any).
Click the Save button to record the damage. The resource holding's condition will chage, the damage will be recorded, and the patron's ledger will be updated with any charge and payment. This information will appear on the patron's receipt.
The next time you view the Resource Condition for this item, you will see the updated condition and details of the damage.
Cancelling a Hold or Changing Queue Position
Click the hold you want to change or cancel to see the detail.
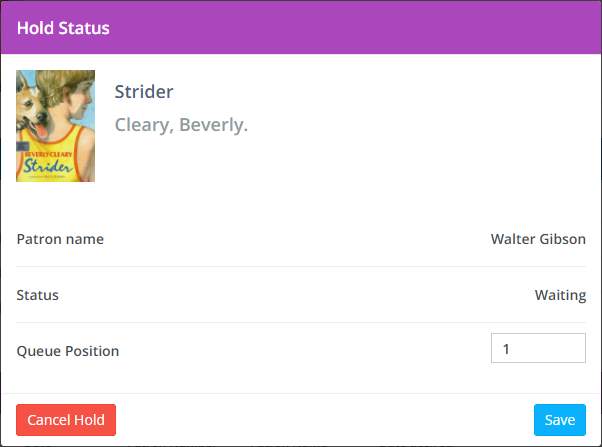
Click Cancel Hold to cancel it, or enter a number in the Queue Position and click Save to change the hold's priority in the queue. 1 is the first person in line, 2 is second, and so on. When you change a hold's queue position, the other holds' positions are pushed up or down to accommodate.
Note: You cannot change the queue position of holds that have a "Holding" status as these are no longer in queue but are set aside and waiting for patron pick-up.
Printing a Hold Slip
You can print hold slips for holds that show a "Holding" status, meaning the resource is holding and ready for the patron to pick up. Click the resource in the Holdslist to see the details on the hold, then click the Hold Slip button.
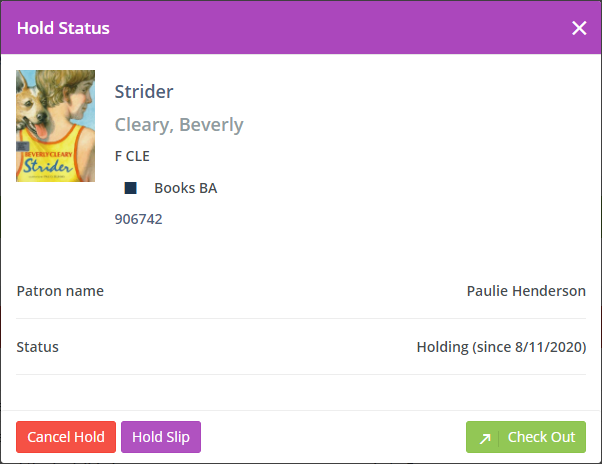
Cancelling a Hold
Click the resource in the Holds for Patrons list to see the details on the hold, then click the Cancel Hold button.
Checking Out a Holding Resource
You can check out a holding resource using the same process you would check out any other item. As a convenience, you can also check it out directly from the Hold Status box. Simply click Check Out and the resource will be checked out to the patron for whom it was holding.


