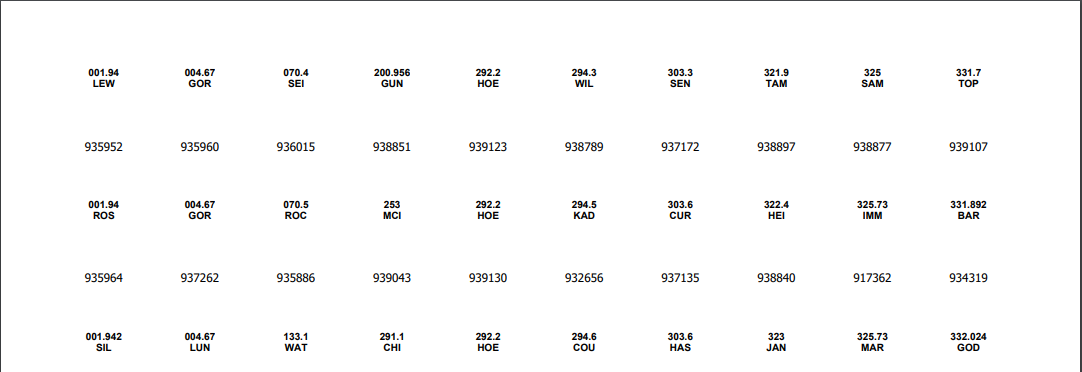
The Spine Labels report prints spine labels for books and other library resources. The primary purpose of spine labels is to make the call number visible on shelved resources. In addition to the call number, you can optionally include the barcode number at the bottom of each spine label.

Surpass Cloud supports a variety of label stock for spine labels. See Label and Card Stock for a list of suppliers and options.
Options

-
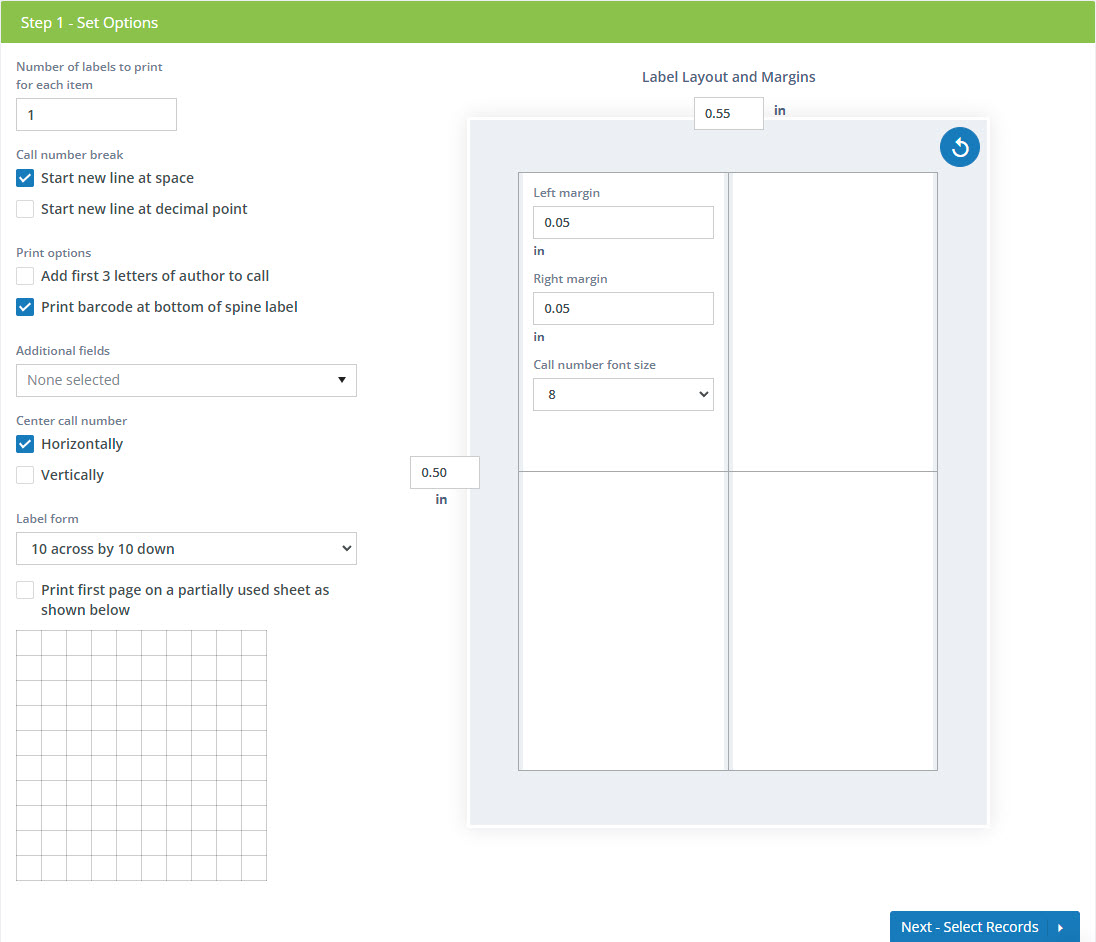
Number of labels to print for each item - Set how many barcode labels you want for each item.
-
Start new line at space - If your call numbers include spaces, do you want the call number to be printed on multiple lines, broken at the spaces?
-
Start a new line at decimal point - If your call numbers include decimal points (such as Dewey Decimal), do you want the decimal (cutter) part printed on a separate line?
-
Add first 3 letters of author to call - Many libraries include the first few letters of the author name after the call number on spine and barcode labels to help further organize and shelve resources. Select this option if you want to add the first three letters of the author's name after the call number for resources where this is not already at the end of the call number.
-
Print barcode at bottom of spine label - Do you want the barcode number printed on the label?
-
Additional fields - Select one or multiple additional holdings fields to include on the label. Keep in mind that space is limited.
-
Center call number Horizontally - Do you want the call number centered horizontally on the label?
-
Center call number Vertically - Do you want the call number centered vertically on the label?
-
Label form - Select the type of label stock you will be using.
-
Print first page on a partially used sheet as shown below - When printing labels, you will usually end up with a last page that is not fully used. Surpass Cloud gives you the option to use that partially printed page as the first page the next time you print labels. It will skip the "used" labels you selected (shown in gray) and start printing on the first available blank label.
Running a sheet of labels through a printer for a second time has the potential to cause damage to your printer. See your printer documentation or contact your printer manufacturer to see whether there are recommendations regarding this.
Label Layout and Margins
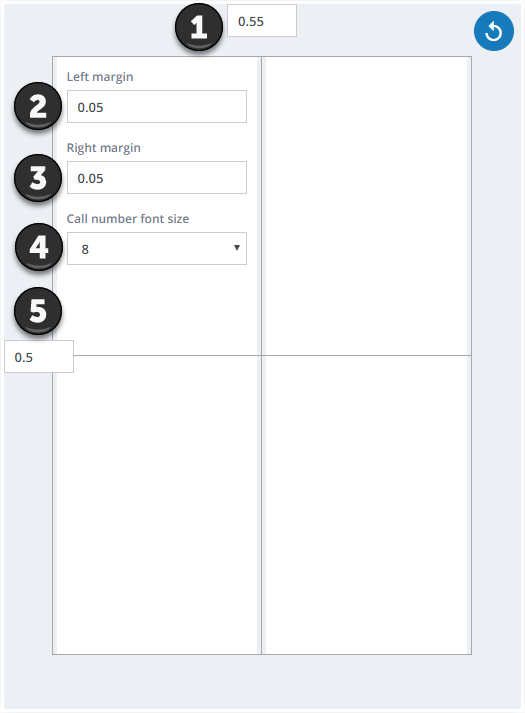
There are variations in label stock and in the way printers feed sheets of labels. You can adjust the top and left margins, as well as the margins between the edges of the label and the text if you find that the print is out of alignment with your labels.

- 1. Page Top Margin - The space between the top edge of the page and the first label.
- 2. Label Left Margin - The space between the left edge of each label column and the label text contents.
- 3. Label Right Margin - The space between the right edge of each label column and the label text contents.
- 4. Call number font size - The size of the font to be used for the call number.
- 5. Page Left Margin - The space between the left edge of the page and the first label.
Reset to Defaults Button

Click this button to reset the margins to the default values.
If this is the first time you have printed using this label stock and printer, test first by printing one page on a plain sheet of paper. Then, lay the printed sheet on top of a page of labels and hold up to the light to check the alignment.
Selecting Records
The next step is to select which resources you want to print barcode labels for, using either Basic or Advanced record selection options. See Selecting Records for Resource Reports for detailed instructions.
If your library is part of a system that has multiple locations or branches, the report will be based on the selected location at the top of the page and whether you have selected All Locations or Selected Location Only.

Viewing, Printing, and Downloading
The report can be viewed on-screen, printed, or downloaded as a PDF. See Viewing and Printing Reports.
