- Print
- DarkLight
- PDF
Customizing the Home Page and Theme
You can customize many aspects of your Surpass Cloud OPAC. You don't need any expertise in website design to make it beautiful, informative, and helpful for your patrons. Even major changes can be made with just a few clicks. You can customize:
- The theme and colors
- The library logo shown at the top and bottom of the page
- The banner image and welcome message
- The various widgets shown on the home page
- The footer shown at the bottom of all pages
Changes to search settings, feature menu, and other options can be made in Surpass Cloud Admin on the Settings : Public Catalog : General page and the other OPAC settings pages.
📺 Related Videos
Customize the Surpass Cloud OPAC Banner, Logo, Theme, and Footer
Customizing the OPAC Home Page with Widgets
OPAC Settings: New in Library and Popular Titles
Reviews in the Surpass Cloud OPAC
Bulletins in the Surpass Cloud OPAC
Creating and Using Resource Lists in the Surpass Cloud OPAC
Starting Customization
To get started, click Login in the upper-right corner and log in using your patron account.
To customize the home page and color theme your patron role must have OPAC Administrator permissions. You can see your role by finding your patron record on the Patrons : View page. You can check the permissions in your role on the Settings : Security : Roles page.
When you are logged in and your role allows OPAC administration, you'll see a spinning gear icon on the left side near the top of the page. Click this icon to enter the home page editing mode.

When you enter editing mode, new controls appear on areas of the page that can be customized.
Header
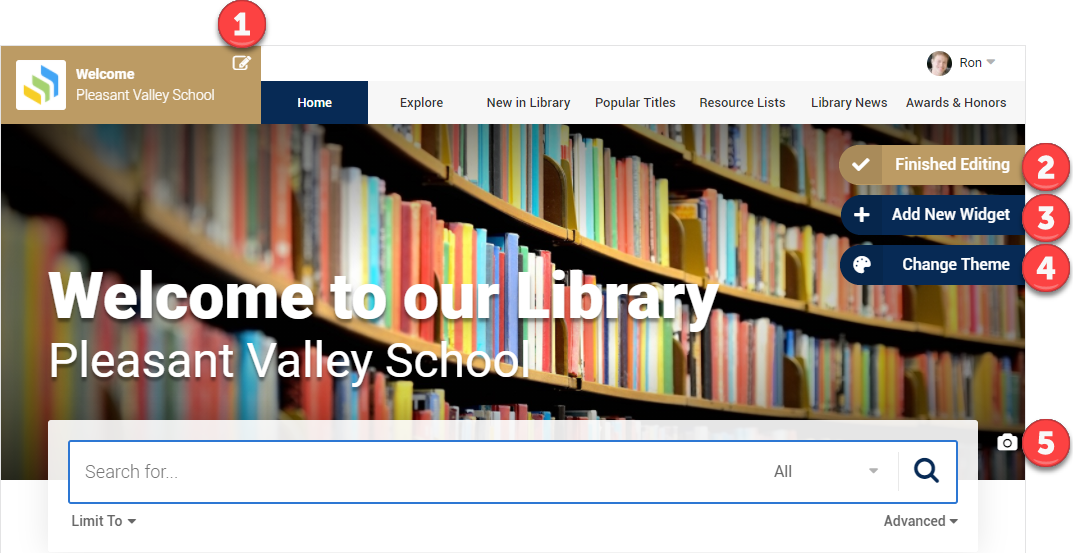
1 - Logo Area
Click the edit icon to change the logo and/or change the text that appears above the library name. The logo, library name, and optional message appears at the top of every page. The logo also appears on the footer at the bottom of every page.
![]()
You can edit the "Welcome" text that appears above the library name (leave it blank if like), remove the existing logo, upload a logo, or choose a previously uploaded logo.
To look best, your logo image should be square, about 150 x 150 pixels in size, and have a solid or transparent background. PNG and JPEG formats are recommended. Elaborately detailed logos and logos with small text will probably not look good. If possible, use a version of your logo without text or small details.
2 - Finish Editing
Click the Finish Editing button to exit edit mode when you are finished.
3 - Add New Widget
Click the Add New Widget button to add a new widget to the home page.
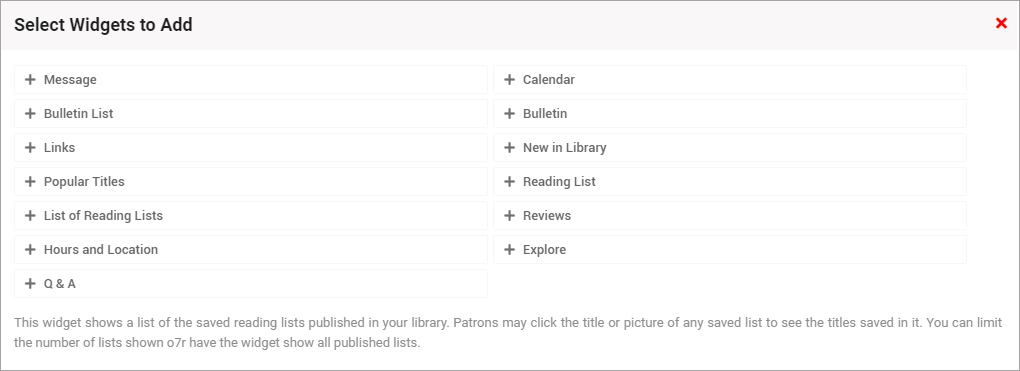
Select the widget you want to add. It will be inserted at the bottom of the home page where you may edit its settings.
4 - Change Theme
Click the Change Theme button to change the color theme used throughout Surpass Cloud OPAC. You can select from existing themes or create a custom color scheme of your own.
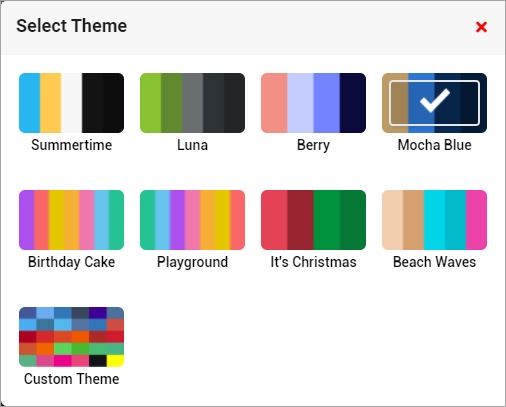
Four of the themes: Birthday Cake, Playground, It's Christmas, and Beach Waves, have additional whimsical details. Some include special banner images, which may be changed.
The page changes instantly when you select a theme so that you can see how it will look.
Custom Theme
You can adjust the colors in the existing theme or create a completely new color scheme, perhaps to match your library's official colors or to fit in with your library's main website. Click the Custom Theme choice to edit the colors of various elements used in OPAC.
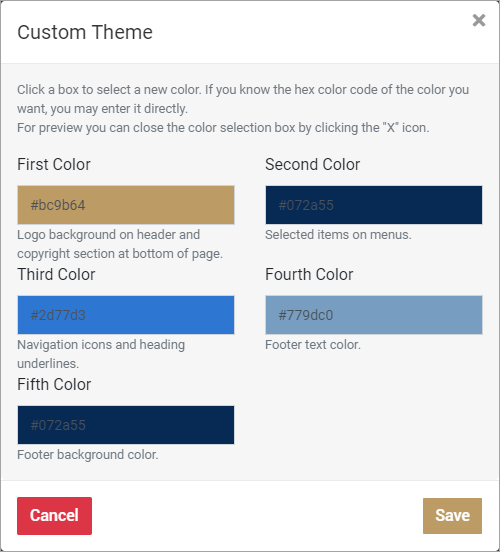
There are five colors that can be adjusted. The text below each color block tells you where it is used in OPAC. Click a color to edit it.
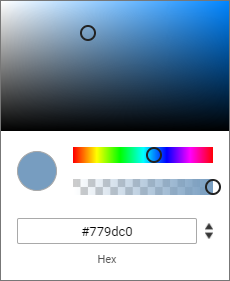
You can edit the color by using the "rainbow" and transparency sliders. Use the large color area at the top to select a shade of the selected color.
Pro tip: If you're matching a website or offical institution color scheme, try to find out the exact HTML hex color codes (e.g.
#779dc0) and enter those directly instead of trying to match a color by sight. This will give you an exact match.
5 - Banner
Click the camera icon in the lower-right corner of the banner image to edit the banner image and text.
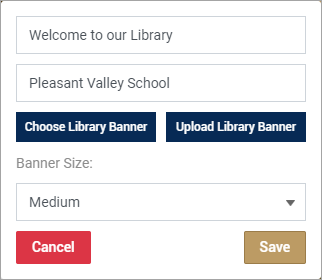
There are two lines of text that can be edited. The top line is in larger bold text and the bottom line is smaller. You can choose an existing banner image or upload a new one.
To look best, your banner image should be rectangular, approximately 1600 x 650 pixels in size (about 2.5 times wider than height). It's generally best if your banner is an image only, such as a photo of your library. The banner image will be cropped to fit the dimensions of the user's display, so if you have a focal point make sure it's in the center so it is not cropped.
Widgets
The main body of the home page contains widgets. There are over a dozen different types of widgets you can add to the home page. See Home Page Widgets for details on adding and editing widgets.

6 - Widget Controls
At the top of each widget are three buttons that can be used to move the widget to a different place on the page, edit the widget's settings, or remove it from the home page.
Move - Click here to drag the widget to a new position on the home page.

Edit - Edit the settings of the widget.

Remove - Remove the widget from the home page.

Page Footer
The page footer appears at the bottom of every page in your OPAC and is designed to show social media links, other website links, and your library's contact information.

7 - Library Name and Social Media
This section shows your library logo (if any) and name, along with any social media links that you might want to include.
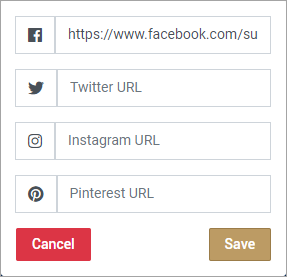
Click the edit button to add or edit the URLs of your library's social media pages on Facebook, Twitter, Instagram, and/or Pinterest. Leave any or all blank if you like.
8 - Links
This section shows any links to other sites that you would like to include.
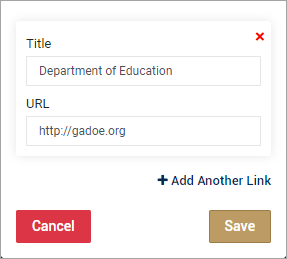
Click the edit button to add or edit links. Each link has a title that's shown to the user and the address (URL) of the website. Click the +Add Another Link button to add more links. Click the X button in the upper-right corner of a link to remove it.
This section will be shown to users only when there is at least one link.
9 - Contact Us
This section shows your library's phone number, email address, and/or website.
Click the edit button to add or edit your library's contact information. You can leave any or all blank.
This section will be shown to users only when there is at least one form of contact listed.


